
The Neophyte's Custom Liquid Cooling Guide: How To, Why To, What To Expect
- Posted in
- Cases/Cooling/PSUs
- Systems
- G.Skill
- Corsair
- Gigabyte
- Haswell
- Water Cooling
- Plextor
- NVIDIA
- Overclocking
- Swiftech
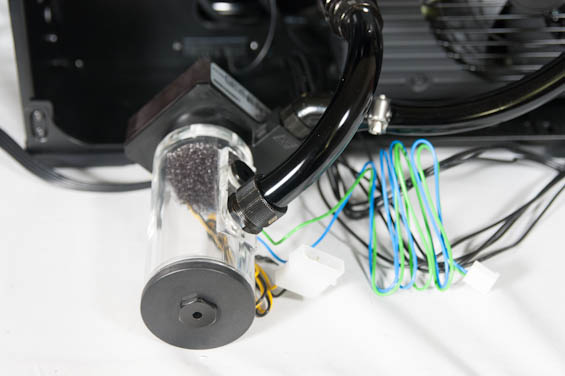
Before you start assembling your loop, you'll really want a clear idea of how everything is going to route together. It will help to physically draw a diagram, even a hastily scribbled one, so you have some idea of how everything will connect. For the Corsair Carbide Air 540, I knew the cubby next to the power supply was where I wanted to put the reservoir and pump assembly. That meant that two lines were going to be routing back behind the motherboard: the line that flowed into the reservoir, and the line exiting the pump.
Below is the sequence I used for my loop, and it shouldn't be too hard to use it as a basic blueprint. This is undoubtedly going to create contention; I spent hours and hours reading posts on different watercooling forums before concluding that the simplest layout would be the best and easiest.
- Reservoir and pump assembly.
- Top radiator (240mm).
- Motherboard voltage circuitry.
- CPU waterblock (Apogee HD).
- First GeForce GTX 780 (KOMODO-NV).
- Second GeForce GTX 780 (KOMODO-NV).
- Front radiator (360mm).
- ...and back to the reservoir and pump assembly.
I spent a lot of time playing Tetris with the radiators, attaching and detaching the fans, trying to figure out exactly how everything would fit into the case and how everything would get connected. While the entire assembly probably could've taken only a couple of hours, my work on it went on over the course of three nights. Clearance issues reared their ugly heads a couple of times, necessitating the use of 45 degree and 90 degree adapters, sometimes even in sequence.
Compression in the foreground, worm clamp in the background.
At this point I'm also going to admit the one thing I was most worried and ignorant about when I started this project specifically for those of you out there who are wondering about it, because I couldn't find any instructions in any of the tutorials I read for how to assemble a loop: how to actually connect the tubing to the individual blocks, radiators, reservoir, and pump.
The reservoir, waterblocks, radiators, and pump all have ports which fittings screw into (and screwing in those fittings is what you need the wrenches for). There are essentially two types of fittings I had to worry about: barbs and compressions. Barbs are the conical ports I mentioned earlier; the end of the tubing fits around the barb (typically pretty snugly and requiring a healthy amount of force), and then you use either a nylon clamp or a worm clamp. The nylon clamp snaps around the tubing and should be tightened with a pair of pliers, and is...adequate. The worm clamp needs to be loose and around the tubing before you affix it to the barb, and it's a royal pain to completely tighten because they all use flathead screws, but once it's on secure it's not going anywhere.
Compression fittings start with a barb you have to fit the tubing around, but before that there's a circular piece that goes around the tubing similar to the way you start with a worm clamp. The difference is that there's a set of threads below the barb, and the circular piece screws on to those. The lip in the circular piece squeezes the tubing, compressing it into place and sealing it. These can be extremely difficult to apply if you don't have a good grip and decent forearm strength, but they're tight, much easier to remove than worm clamps, and comparatively easy to connect.
Originally published at https://www.anandtech.com/show/7363/the-neophytes-custom-liquid-cooling-guide-how-to-why-to-what-to-expect (Wayback Machine).