
The Neophyte's Custom Liquid Cooling Guide: How To, Why To, What To Expect
- Posted in
- Cases/Cooling/PSUs
- Systems
- G.Skill
- Corsair
- Gigabyte
- Haswell
- Water Cooling
- Plextor
- NVIDIA
- Overclocking
- Swiftech
For a lot of enthusiasts, a full custom watercooling (or liquid cooling, if you prefer) can be essentially the final frontier. Closed loop coolers have been taking off in a big way, bringing watercooling to the masses, but sacrifices are made in the process. The overwhelming majority of closed loop coolers employ aluminum radiators instead of the copper and brass that are used in custom loops, and the pumps tend to be on the weaker side, presumably to both keep noise down and because there's really only one component to cool. I'm still enthusiastic about these products because they can offer excellent cooling performance without placing the undue strain on the motherboard that a heavy tower air cooler can, and they're typically a win for system integrators who don't want to risk shipping damage. Whether you like it or not, this is the direction the market is heading, although pure air cooling most definitely still has its place.
So why look at watercooling? First, establish how important noise is to you. Watercooling systems (and this includes CLCs) occupy an interesting middle ground. For pure thermal-to-noise efficiency, they're basically unbeatable, but if you want absolute or near absolute silence, you actually have to go back to conventional air cooling. The reason is that watercooling necessitates using a water pump, and while they can be tuned down for efficiency, they're never going to be dead silent. An air cooler will always be a fan plus heatsink; watercooling adds a pump.
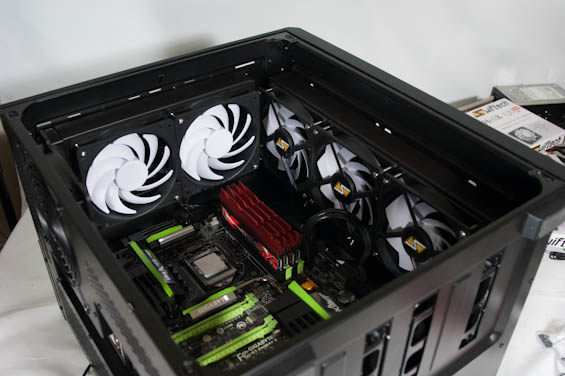
Watercooling is so efficient because it effectively allows you to spread your system's heat load across a tremendously greater surface area. Water transfers heat exceptionally well, and radiators in turn will be massive, densely packed arrays of copper fins. By being able to spread that heat across one or multiple radiators, you also allow yourself to use multiple fans at low speeds. Alternatively, you substantially increase your system's heat capacity, so if you're looking to overclock a little more aggressively, watercooling may be the way to go.
In my opinion, one of the biggest reasons to go for it is actually the potential for watercooling graphics cards, especially in a multi-GPU setup. While the stock blower cooler for the NVIDIA GeForce GTX 780 is actually a work of art and does a stellar job of keeping that card cool, it simply can't hold a candle to a full-card waterblock that can absorb the heat from every heat-generating component on the card, especially the power circuitry. Suddenly you're not risking tripping the 780's boost clock thermal limits anymore, and the blower coolers aren't generating any more of a racket for your trouble.
Of course, building a custom loop is insanely daunting. This is the first time I've ever built one and while guides exist all over the internet, they all feel a bit incomplete in one aspect or another. There's also the fear of spraying coolant all over the inside of your case, or accidentally frying graphics cards when you install the waterblock, etc. It's also a decent amount of work, and it's not cheap. Truthfully, if I hadn't been able to put this together for AnandTech, I don't know that I'd have ever made the attempt. But the opportunity did present itself and now I can at least share the results with you.
Originally published at https://www.anandtech.com/show/7363/the-neophytes-custom-liquid-cooling-guide-how-to-why-to-what-to-expect (Wayback Machine).