
Swiftech H2O-120 Compact and Corsair Nautilus 500: Is Water Better?
- Posted in
- Cases/Cooling/PSUs
Corsair Nautilus 500
When the Corsair name is mentioned, enthusiast memory is the first thing that comes to mind. However, Corsair has branched into other product lines catering to the computer enthusiast. You can now buy Corsair power supplies and Corsair's spin on the simplified water cooling system.
The Nautilus 500 was first introduced last year, but it has proven itself to be an effective and reliable CPU cooling system. For that reason the Nautilus 500 is included in this look at simpler water cooling.
Corsair uses similar components to Swiftech in their simplified water cooler, but that is where the similarity ends. Corsair's vision of better water cooling is an external appliance-like water cooling box connected to an internal CPU water block. Corsair mounts the traditional water block inside, then connects the tubing with quick disconnects to a self-contained cooling box that sits on top of the computer. The black box contains the water pump, radiator, reservoir and fan - all preassembled for easy installation.
In fact, when Corsair first introduced the Nautilus 500 they claimed an eight minute install. For an experienced installer eight minutes is definitely possible, but a first-time water cooler installer might require 15 to 20 minutes. However you measure it, the Corsair is the easiest-to-install water cooler we are aware of that uses conventional water cooling parts. The self-contained coolers that look like air coolers are easier still - but they normally must compromise performance with their small size.
The large box containing the complete Nautilus 500 system is literally filled with every bit of information you might need to understand the Corsair water cooling system.
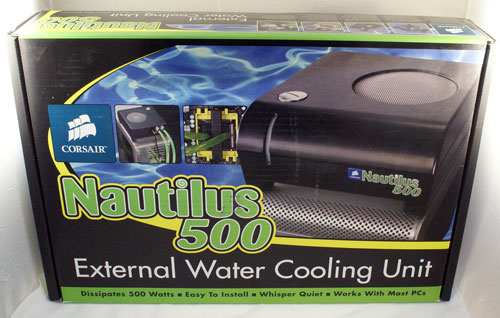
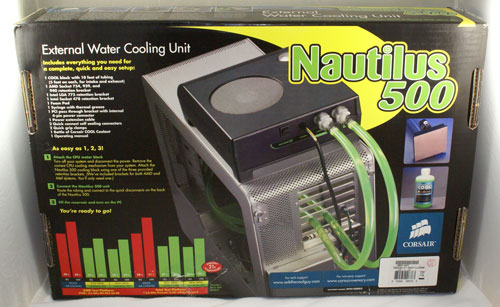
The package front shows the external box sitting on a tower case, while the rear provides a better idea of how the Nautilus 500 installs in a system and a litany of performance claims. Since the target market is likely first-time users of water cooling, it appears Corsair was very smart to provide as much info as possible about the water cooling system and how simple it is to install.
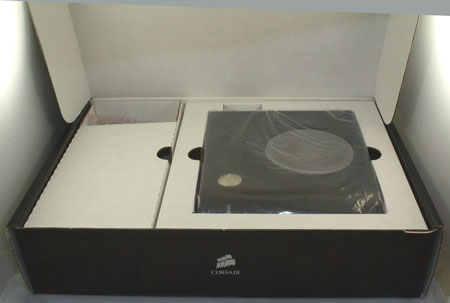
Opening the package you will find the "appliance-style" external cooler on one side and the mounting components under a large flip-up compartment on the other side. This is a first impression that emphasizes the simplicity of the Nautilus 500 compared to the complexity of most water systems.
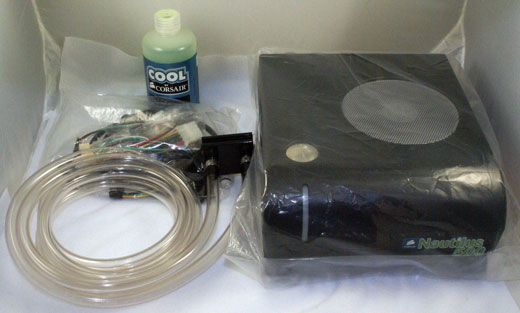
The main parts are the 8"x9"x3-3/4" (WxDxH) external cooling box and the tubing with an attached water block. The tubing is long enough for any install we tried, and it can be cut to length if you wish to shorten the tubing runs. A bottle of cooling concentrate and a bag of small parts complete the contents.
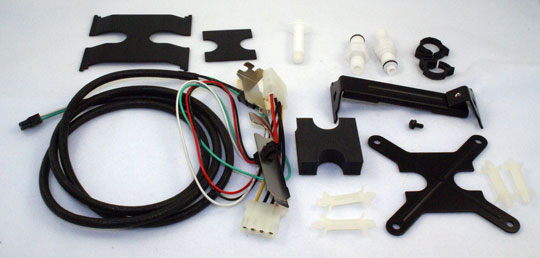
Mounting plates for either Intel or AMD are included. The parts allow installation on Intel Socket 775/478 or AMD 754/939/940. We also had no difficulty installing on Socket AM2. Quick disconnects to insert in the vinyl tubing, easy clamps, motherboard standoffs, thermal grease, a PCI slot cover for tubing and electrical pass-tough, and a power connector that plugs into the PCI slot cover and external cooling box are all contained in the small parts bag.
The fact that Corsair has already attached the vinyl tubing to the all-copper water block was impressive. Corsair also uses quick disconnects for the other end of the tubing which plugs into the external cooler. These thoughtful touches make installation a breeze, even for the first-time user who knows absolutely nothing about installing water cooling.
Installation
For Intel 775, there is no need to remove the mother board to install the water block. Begin by installing the four dual pushpins in the four holes for mounting coolers on a 775 board.
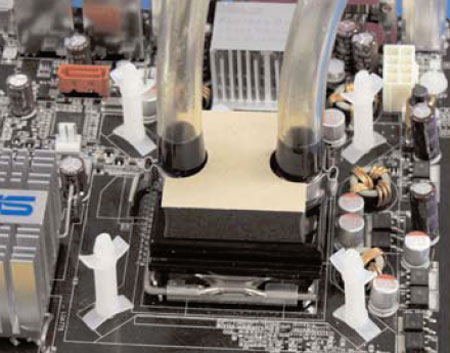
Make sure the post "legs" are in the marked area and are free from board components. Next apply the thermal paste, insert the custom cut foam block on top of the water block, and slide the 775 mounting plate in place above the compression foam.
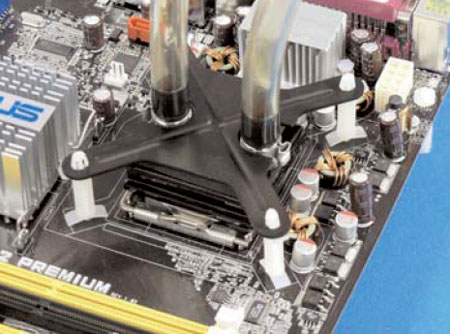
Then align the water block and push the top mounting plate onto the pushpins. If this sounds simple it's because it really is. The only real issue is the fragile pushpin posts. Make sure they are all snapped securely in place. If a pin seems loose you may need to spread the pop-though wings to make sure the pop-through clicks into place.
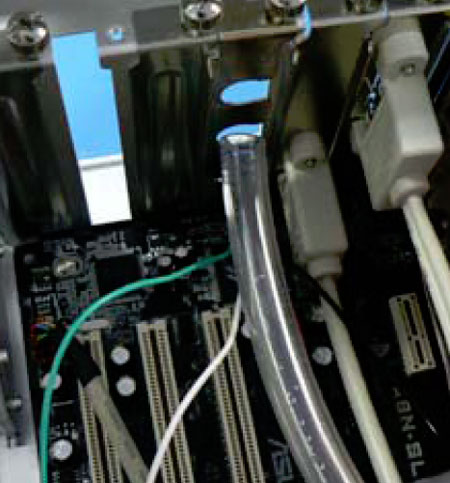
With the water block securely mounted the vinyl tubes are threaded though the PCI slot cover. It is easiest to place the tubes in the unmounted slot cover and adjust the tubing for your needs. Then attach the PCI slot cover to hold the tubes in place. Plug the Molex connector that is off the inside of the slot cover into a 4-pin Molex connector. This will power the external cooling system components.
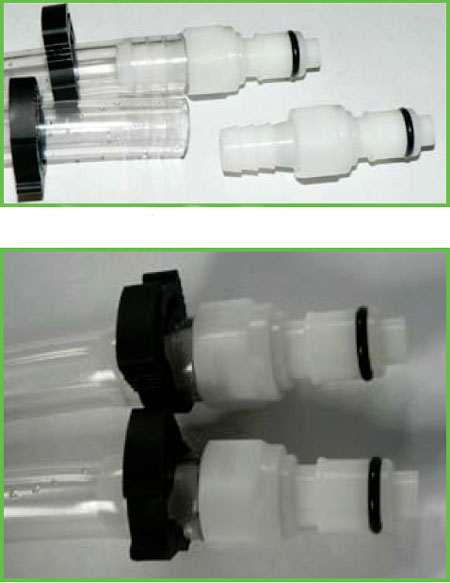
You may shorten the tubing if you wish, but consider future needs before cutting. The quick disconnects slide into the end of the vinyl tubing and are held tight by quick clamps. The finished disconnects then snap into the back of the external cooler. Plug the power cable into the outside connector on the PCI slot cover and the tiny socket on the back of the Nautilus 500.
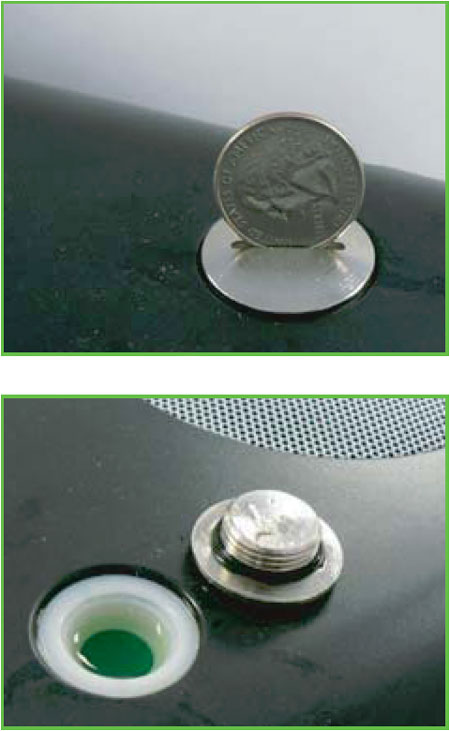
Unscrew the silver plug on top of the cooler with a coin, pour the bottle of concentrate into the cooler, and finish filling with distilled water. Turn on the computer with the plug open and let the air in the water system dissipate. Check for any leaks at the disconnects. Since the internal water block connections were made at the factory it is not absolutely necessary to check for leaks at the water block. Top off the fluid with distilled water. Since it is easy to overfill you should place a rag under the cooler box to catch any spills during the filling process. Finally, screw the plug back in with a coin.
This is really an easy install. It is much simpler, in fact, than air cooler installs where the motherboard must first be removed. However, if you move the Nautilus 500 to another system you will likely need to remove the motherboard to remove the CPU block standoffs. Yes, you can remove just the top plate by squeezing the top legs so they will release from the top plate. However, removing the posts themselves requires squeezing the pushpins from the rear of the motherboard.
Our only complaint about the whole system install is the pushpin posts, as already mentioned. They are too fragile and don't always click securely as is preferred. There is also the issue of the board dismount required for removal. While we don't have a wise suggestion for fixing this, we are confident Corsair can come up with a better 775 mount. So many parts of this system are well thought out and the push-posts appear the only shaky part of the product.
When the Corsair name is mentioned, enthusiast memory is the first thing that comes to mind. However, Corsair has branched into other product lines catering to the computer enthusiast. You can now buy Corsair power supplies and Corsair's spin on the simplified water cooling system.
The Nautilus 500 was first introduced last year, but it has proven itself to be an effective and reliable CPU cooling system. For that reason the Nautilus 500 is included in this look at simpler water cooling.
Corsair uses similar components to Swiftech in their simplified water cooler, but that is where the similarity ends. Corsair's vision of better water cooling is an external appliance-like water cooling box connected to an internal CPU water block. Corsair mounts the traditional water block inside, then connects the tubing with quick disconnects to a self-contained cooling box that sits on top of the computer. The black box contains the water pump, radiator, reservoir and fan - all preassembled for easy installation.
In fact, when Corsair first introduced the Nautilus 500 they claimed an eight minute install. For an experienced installer eight minutes is definitely possible, but a first-time water cooler installer might require 15 to 20 minutes. However you measure it, the Corsair is the easiest-to-install water cooler we are aware of that uses conventional water cooling parts. The self-contained coolers that look like air coolers are easier still - but they normally must compromise performance with their small size.
The large box containing the complete Nautilus 500 system is literally filled with every bit of information you might need to understand the Corsair water cooling system.
The package front shows the external box sitting on a tower case, while the rear provides a better idea of how the Nautilus 500 installs in a system and a litany of performance claims. Since the target market is likely first-time users of water cooling, it appears Corsair was very smart to provide as much info as possible about the water cooling system and how simple it is to install.
Opening the package you will find the "appliance-style" external cooler on one side and the mounting components under a large flip-up compartment on the other side. This is a first impression that emphasizes the simplicity of the Nautilus 500 compared to the complexity of most water systems.
The main parts are the 8"x9"x3-3/4" (WxDxH) external cooling box and the tubing with an attached water block. The tubing is long enough for any install we tried, and it can be cut to length if you wish to shorten the tubing runs. A bottle of cooling concentrate and a bag of small parts complete the contents.
Mounting plates for either Intel or AMD are included. The parts allow installation on Intel Socket 775/478 or AMD 754/939/940. We also had no difficulty installing on Socket AM2. Quick disconnects to insert in the vinyl tubing, easy clamps, motherboard standoffs, thermal grease, a PCI slot cover for tubing and electrical pass-tough, and a power connector that plugs into the PCI slot cover and external cooling box are all contained in the small parts bag.
The fact that Corsair has already attached the vinyl tubing to the all-copper water block was impressive. Corsair also uses quick disconnects for the other end of the tubing which plugs into the external cooler. These thoughtful touches make installation a breeze, even for the first-time user who knows absolutely nothing about installing water cooling.
Installation
For Intel 775, there is no need to remove the mother board to install the water block. Begin by installing the four dual pushpins in the four holes for mounting coolers on a 775 board.
Make sure the post "legs" are in the marked area and are free from board components. Next apply the thermal paste, insert the custom cut foam block on top of the water block, and slide the 775 mounting plate in place above the compression foam.
Then align the water block and push the top mounting plate onto the pushpins. If this sounds simple it's because it really is. The only real issue is the fragile pushpin posts. Make sure they are all snapped securely in place. If a pin seems loose you may need to spread the pop-though wings to make sure the pop-through clicks into place.
With the water block securely mounted the vinyl tubes are threaded though the PCI slot cover. It is easiest to place the tubes in the unmounted slot cover and adjust the tubing for your needs. Then attach the PCI slot cover to hold the tubes in place. Plug the Molex connector that is off the inside of the slot cover into a 4-pin Molex connector. This will power the external cooling system components.
You may shorten the tubing if you wish, but consider future needs before cutting. The quick disconnects slide into the end of the vinyl tubing and are held tight by quick clamps. The finished disconnects then snap into the back of the external cooler. Plug the power cable into the outside connector on the PCI slot cover and the tiny socket on the back of the Nautilus 500.
Unscrew the silver plug on top of the cooler with a coin, pour the bottle of concentrate into the cooler, and finish filling with distilled water. Turn on the computer with the plug open and let the air in the water system dissipate. Check for any leaks at the disconnects. Since the internal water block connections were made at the factory it is not absolutely necessary to check for leaks at the water block. Top off the fluid with distilled water. Since it is easy to overfill you should place a rag under the cooler box to catch any spills during the filling process. Finally, screw the plug back in with a coin.
This is really an easy install. It is much simpler, in fact, than air cooler installs where the motherboard must first be removed. However, if you move the Nautilus 500 to another system you will likely need to remove the motherboard to remove the CPU block standoffs. Yes, you can remove just the top plate by squeezing the top legs so they will release from the top plate. However, removing the posts themselves requires squeezing the pushpins from the rear of the motherboard.
Our only complaint about the whole system install is the pushpin posts, as already mentioned. They are too fragile and don't always click securely as is preferred. There is also the issue of the board dismount required for removal. While we don't have a wise suggestion for fixing this, we are confident Corsair can come up with a better 775 mount. So many parts of this system are well thought out and the push-posts appear the only shaky part of the product.
Originally published at https://www.anandtech.com/show/2328 (Wayback Machine).