
The GIGABYTE X399 DESIGNARE EX Motherboard Review
BIOS
Like almost every motherboard nowadays, the GIGABYTE X399 Designare EX sports a graphical BIOS. Strangely, GIGABYTE has the advanced mode enabled by default for users who first enter the BIOS. The motherboard also resets to the advanced mode after clearing the BIOS. The "easy" mode is almost hidden, with the user having to move the mouse to the bottom of the screen to reveal its existence. After pressing the "easy mode" button, the BIOS is essentially reduced into a single screen that mostly provides system information and monitoring. The few options that a casual user might need, such as boot sequence and fan speed adjustments, are accessible from this page.

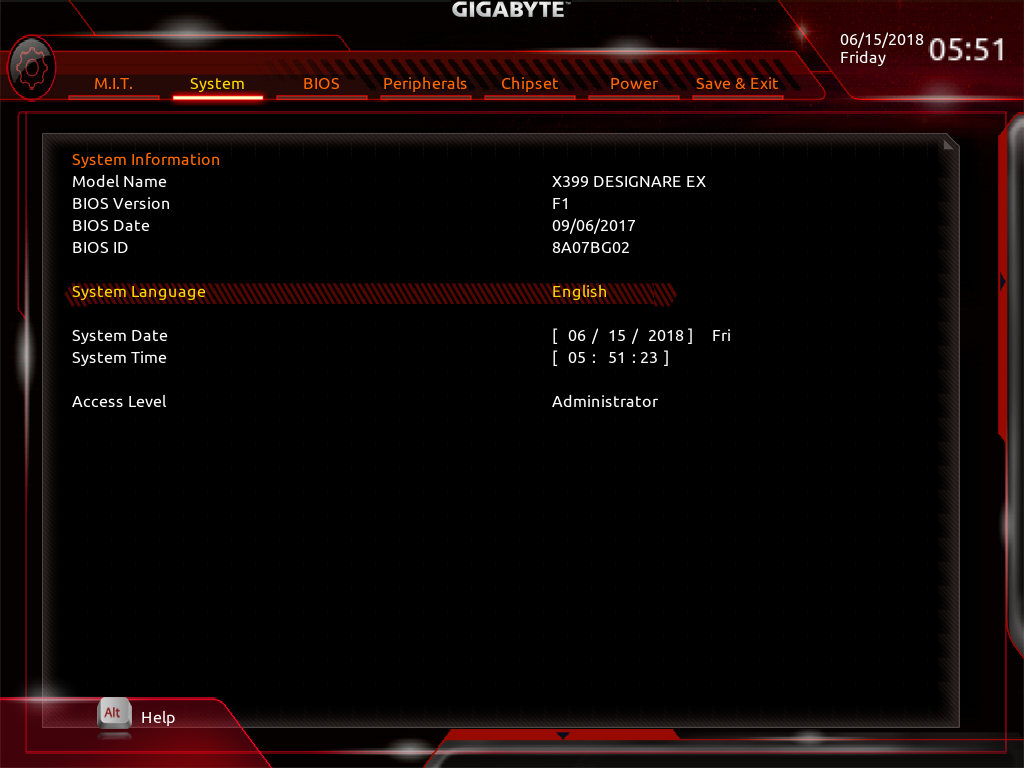
The Classic (or advanced) mode reveals all of the motherboard's menus and options. The BIOS defaults to the second tab, the "System" tab, which contains only basic system information and the language selection option.
The first tab from the left (M.I.T.) is perhaps the most important of the entire BIOS. It is a complex section that is divided into five submenus, with a sixth option offering access to semi-graphical fan speed options. The other five menus include the frequency, memory and voltage settings of the motherboard.


The "Advanced Frequency Settings" submenu includes frequency settings for both the CPU and the RAM. Only the base CPU clock ratio and memory frequency multiplier can be adjusted from the main page, with the rest of the CPU-related options inside a second submenu. From this submenu, the user can enable/disable the core performance boost (enabled by default) and other CPU-related features, including SVM (virtualization - disabled by default).
The "Advanced Memory Settings" once again includes the memory frequency multiplier and the memory profile options. By default, the memory timings are set to Auto and the BIOS informs the user of the value each setting has. If the memory timing mode is switched from Auto to Manual, the user will be able to change the five "standard timing" settings, plus a very long list of the "advanced timing" settings. That probably is about as customizable as it gets. A small submenu also includes the memory power/gear down and interleaving options.
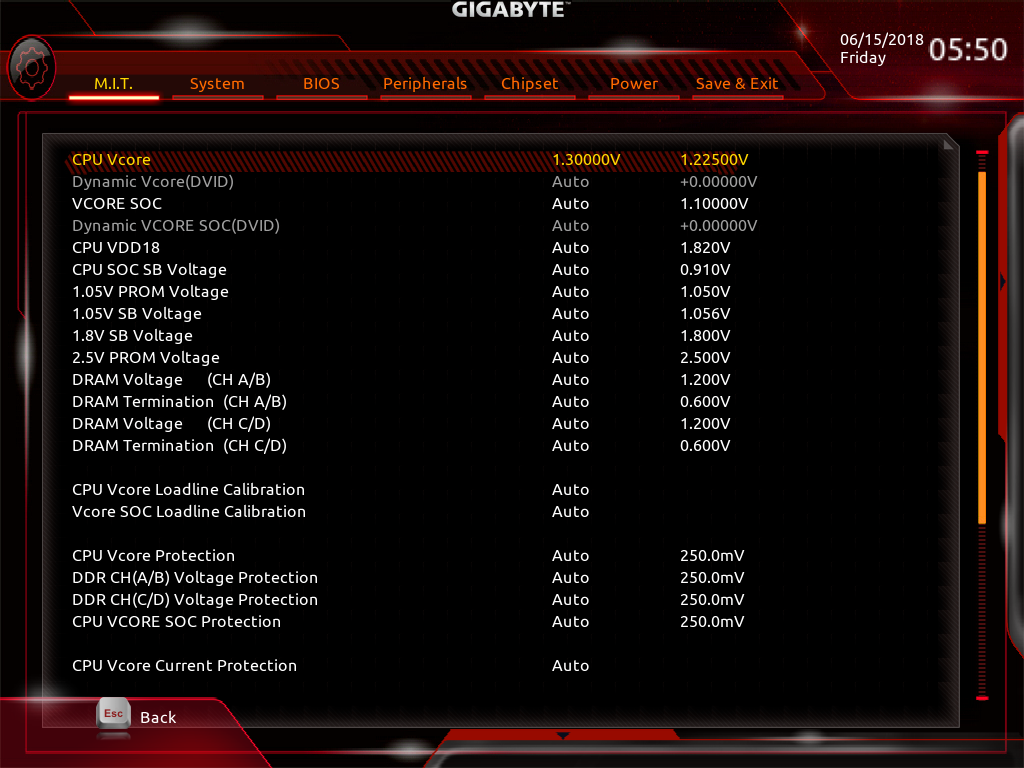
The "Advanced Voltage Settings" submenu brings up all of the voltage, frequency, and current controls. Almost all of the voltage settings are absolute, with relative (offset) options available only for the CPU Vcore and VSOC. Note that the CPU thermal control/throttling options are not included in this menu.
The fourth submenu, "PC Health Status" is purely informative and shows only the voltage sensor readings, no temperature or fan-related information. Finally, the fifth submenu, "Miscellaneous Settings", only includes two options, one for the configuration of the PCI Express slots and one for the enhancement of legacy benchmarks.
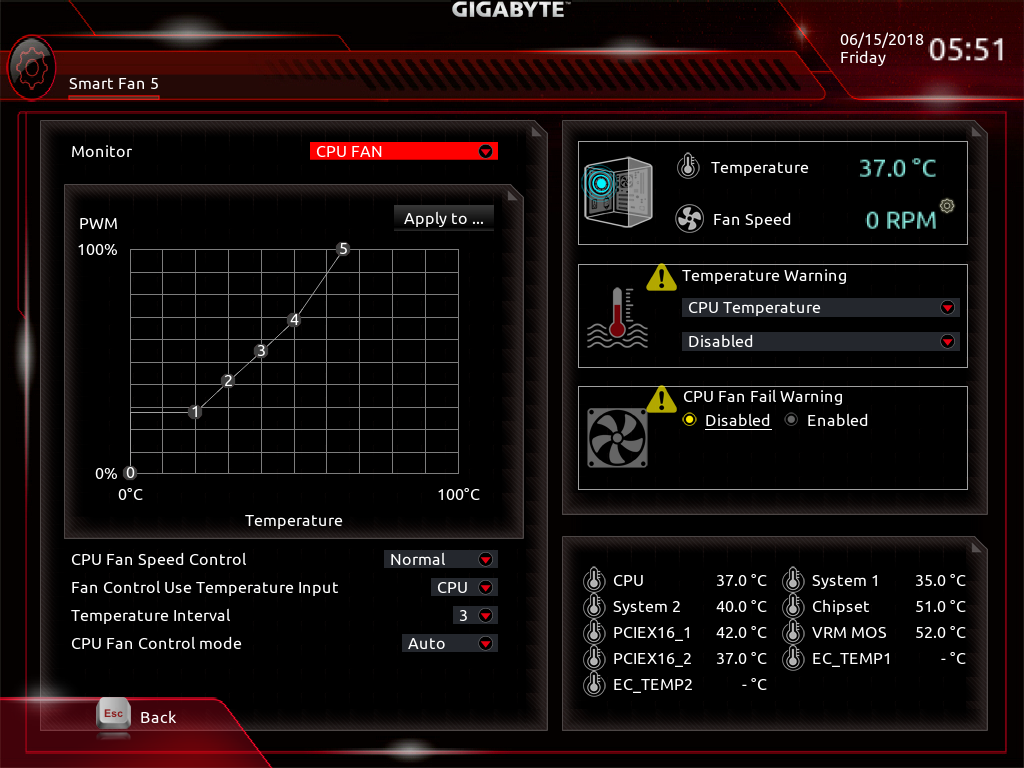
The Smart Fan 5 submenu brings up a graphic interface for the monitoring and adjustment of the fans that are connected to the onboard headers. There are three preset options, "Normal", "Silent" and "Full Speed", as well as manual control that allows the user to adjust the speed of each device according to a specific system temperature.
After M.I.T., the only other tab that warrants any special attention is the "Peripherals" tab. This tab usually contains settings that control a motherboard's onboard chipsets and some basic chipset-related options. In this case however, the "Peripherals" tab also contains both the RGB Fusion app and the AMD CBS submenu. The former brings up a graphical interface that allows for the programming of the onboard and header RGB lighting options. The latter is a messy series of submenus that include a lot of Ryzen-specific options. Many of the submenus include only one or two options, suggesting that gathering them all into a single submenu would have probably been a wiser design choice. CPU throttling options can be found under the "Zen Common Options" submenu and trying to access them brings up a disclaimer/warning screen.

The rest of the submenus are simple and without any hidden surprises. The "BIOS" and "Chipset" submenus contain mostly boot-related and SATA-related options respectively. The "Power" menu also contains only power-related settings and the High Precision Event Timer (HPET) setting (enabled by default).


Originally published at https://www.anandtech.com/show/13001/the-gigabyte-x399-designare-ex-motherboard-review (Wayback Machine).