
Recovering Data from a Failed Synology NAS
Recovering the Data
Ubuntu + mdadm
After booting Ubuntu with all the four drives connected, I first used GParted to ensure that all the disks and partitions were being correctly recognized by the OS.

Synology's FAQ presents the ideal scenario where the listed commands work magically to provide the expected results. But, no two cases are really the same. When I tried to follow the FAQ directions, I ended up with a 'No arrays found in config file or automatically' message. No amount of forcing the array assembly helped.
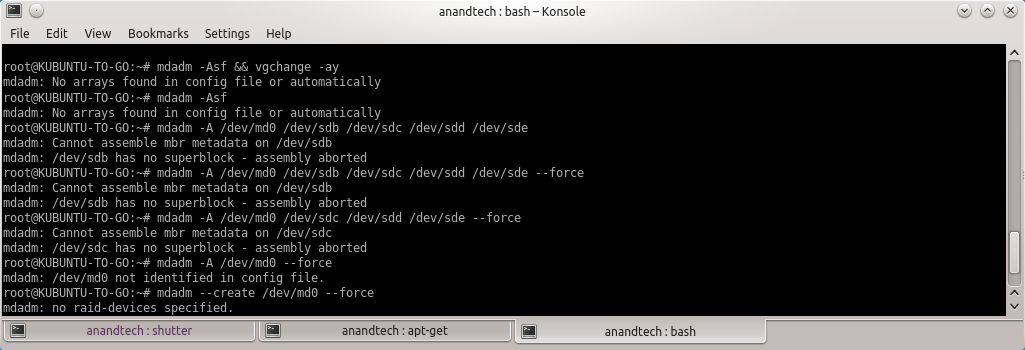
After a bit of reading up the man pages, I decided to look up mdstat and found that a md127 was actually being recognized from the Synology RAID operations. Unfortunately, all the drives had come up with a (S) spare tag. I experimented with some more commands after going through some Ubuntu forum threads.
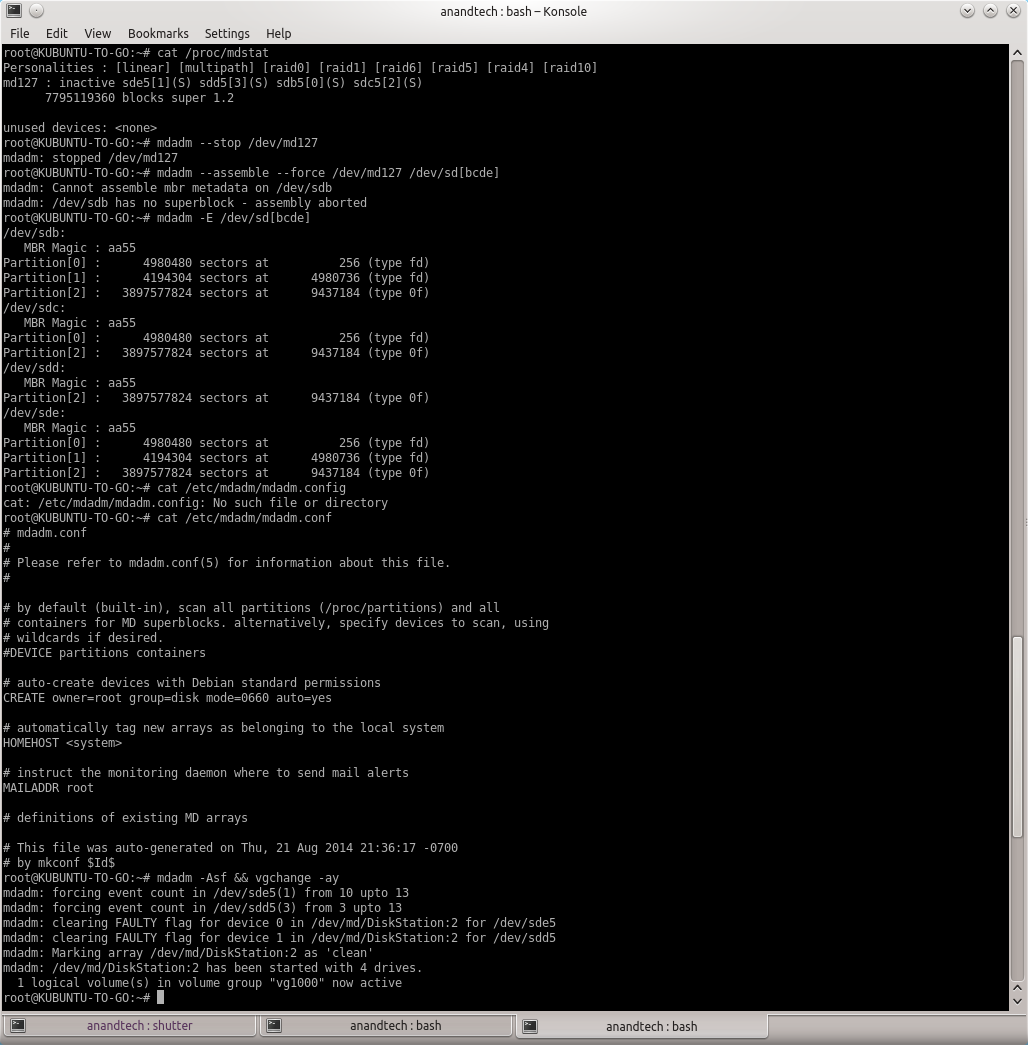
The trick (in my case) seemed to lie in actually stopping the RAID device with '--stop' prior to executing the forced scan and assemble command suggested by Synology. Once this was done, the RAID volume automatically appeared as a Device in Dolphin (a file explorer program in Ubuntu).
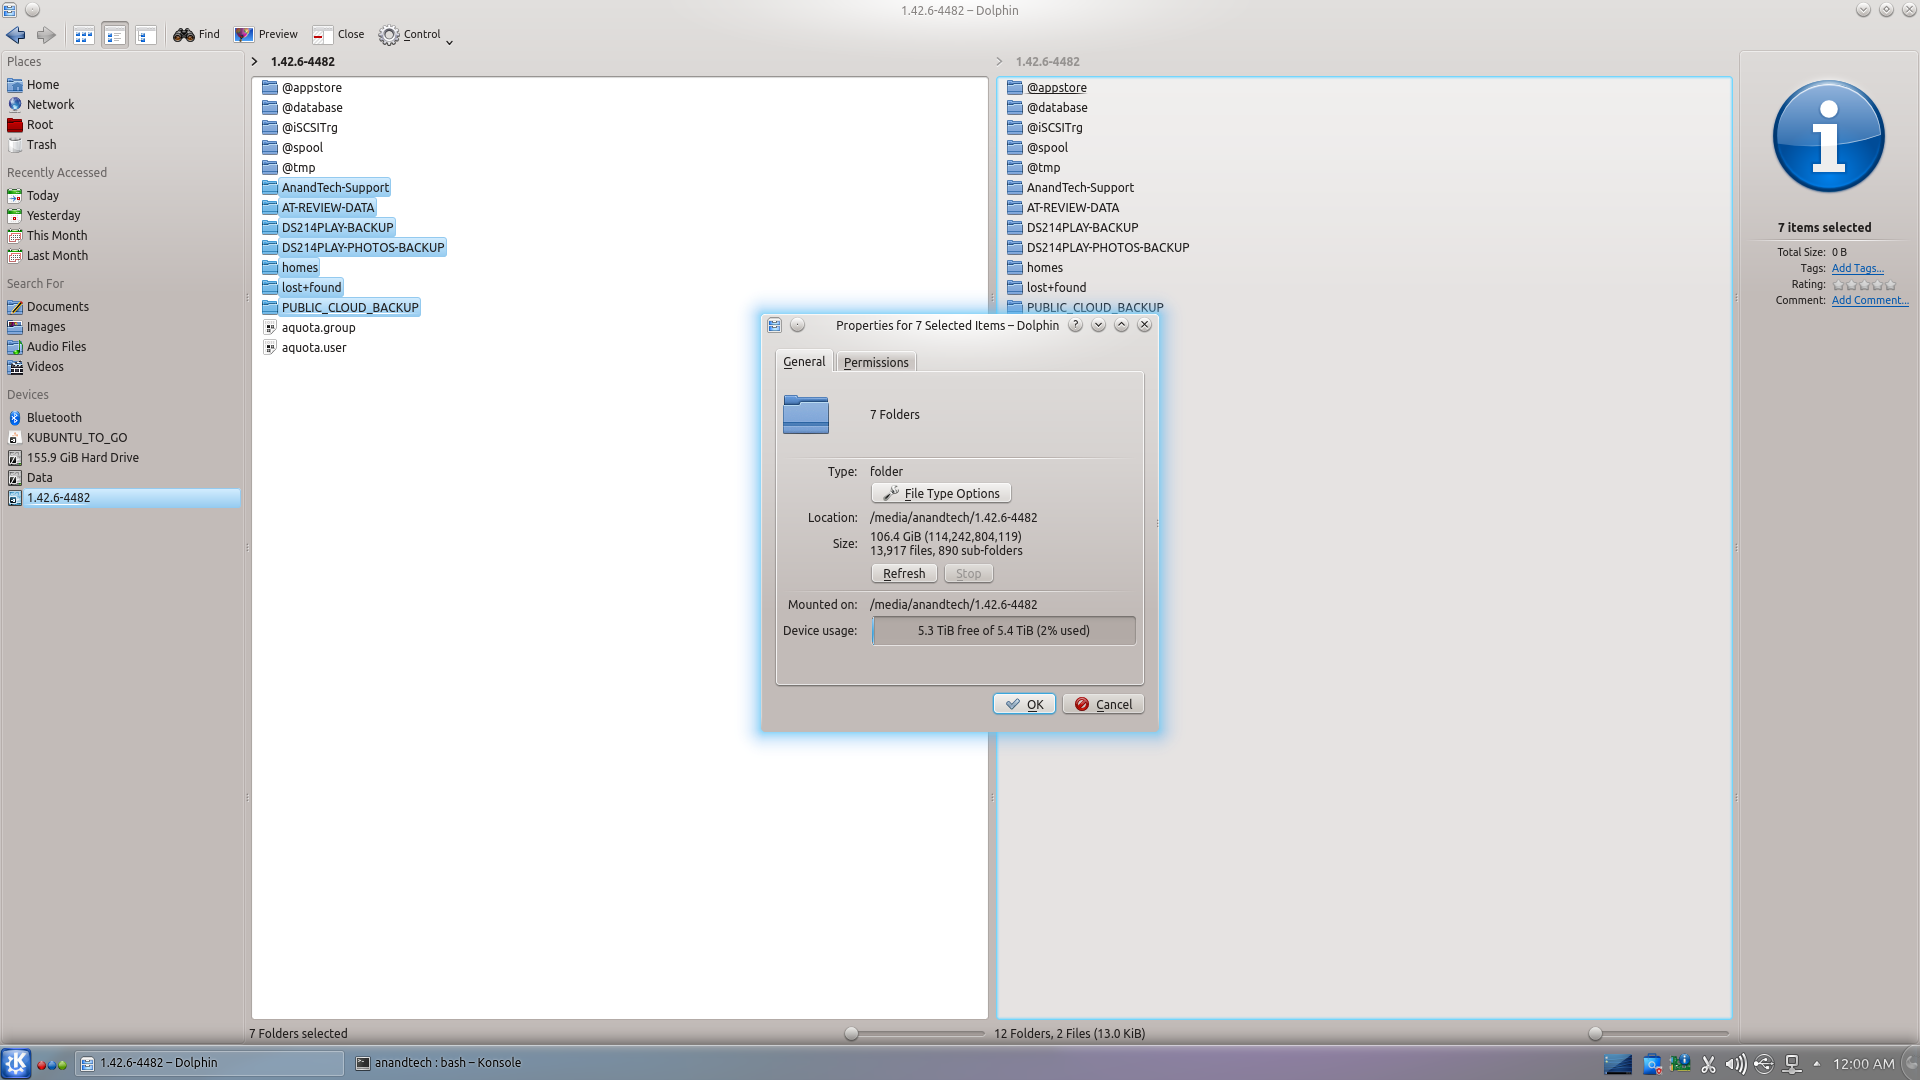
The files could then be viewed and copied over from the volume to another location. As shown above, the ~100 GB of data was safe and sound on the disks. Given the amount of time I had to spend searching online about mdadm, and the difficulties I encountered, I wouldn't be surprised if users short on time / little knowledge of Linux decide to go with a Windows-based solution even if it costs money.
Windows + UFS Explorer
Prior to booting into Windows, I had all the four drives and the LaCie DAS connected to our DAS testbed. The four drives were recognized as having unknown partitions (thanks to most of them being in EXT4 format). However, that was not a problem for UFS Explorer. All the partitions in all the connected drives were recognized correctly and the program even presented the reassembled RAID-5 volume at the very end.
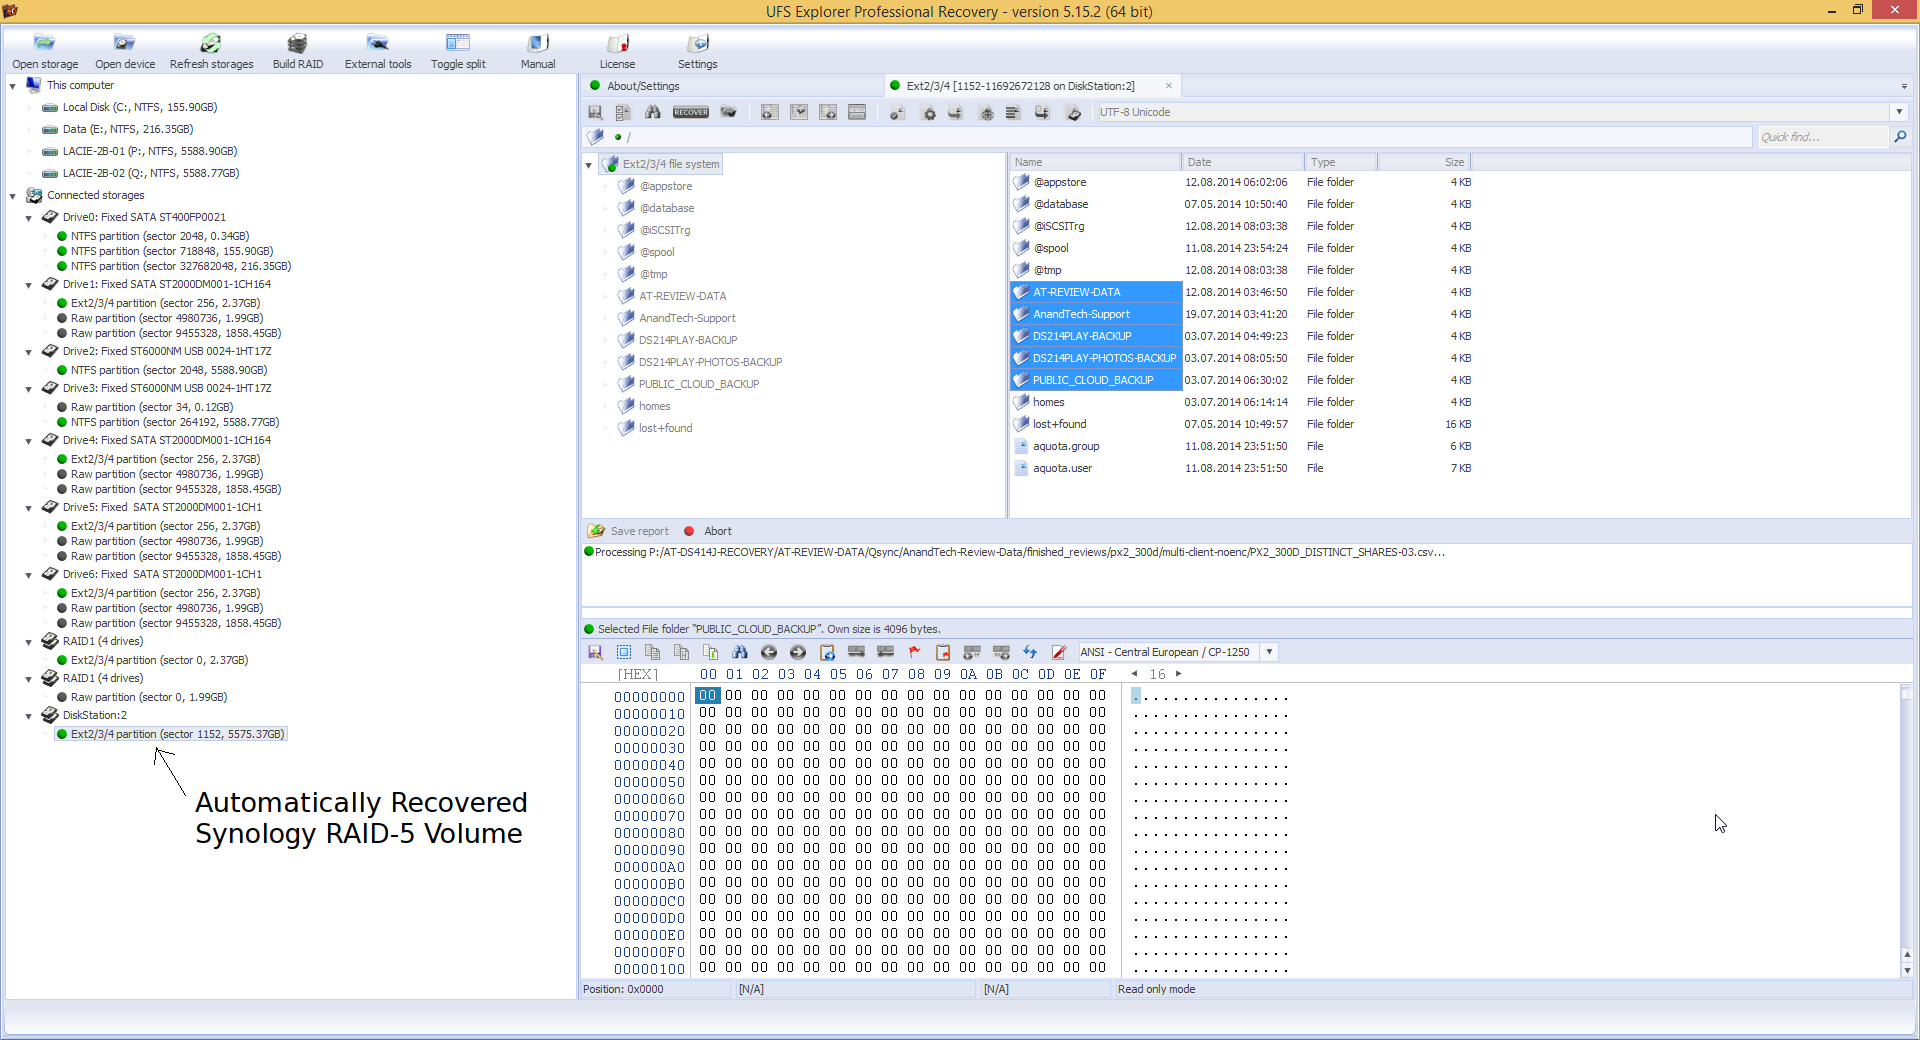
After this, it was a simple process of highlighting the appropriate folders in the right pane and saving it to one of the disks in the DAS.


Fortunately, I had only around 100 GB of data in the DS414j at the time of failure, and I got done with the recovery process less than 10 hours after waking up to the issue.
Originally published at https://www.anandtech.com/show/8399/recovering-data-from-a-failed-synology-nas (Wayback Machine).