
SilverStone FT03 Mini Review: We'll Make You Fun Size
Assembling the SilverStone FT03 Mini
As I stressed over and over again in the previous section, assembly of the SilverStone FT03 Mini is a very specific process and you really do have to follow the instruction manual to the letter. With that said, however, I was surprised at just how easily the build came together. There were places I struggled with the FT03, but the Mini was a remarkably simple affair for a Mini-ITC case, all things considered.
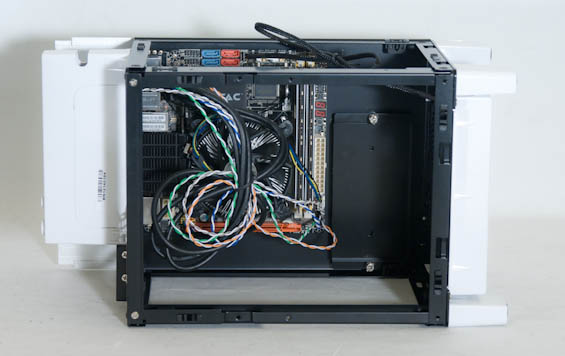
When you get started, you want to tear down the case completely per the instructions, because you'll be putting it right back together the same way. The motherboard tray includes the standoffs needed for Mini-ITX, and the board itself goes in easily enough. I also cabled the motherboard at this juncture, but wasn't able to pre-install power cables; our test PSU wasn't modular, although SilverStone is actually going to make a modular SFX power supply available in the near future that should be ideal for cases like this one.


The next step is installing the power supply, which suspends from the top of the case. Since it's an SFX power supply the weight isn't a major issue (and the frame of the case can definitely handle it), but SilverStone seems to have been a bit miserly in the number of screws they included with the FT03 Mini. There are five points to screw in the PSU, but there were only enough screws available to do the four corners. You can see the specific way the power cables are supposed to tuck into the enclosure, though, and this was a good time to get them connected where possible.
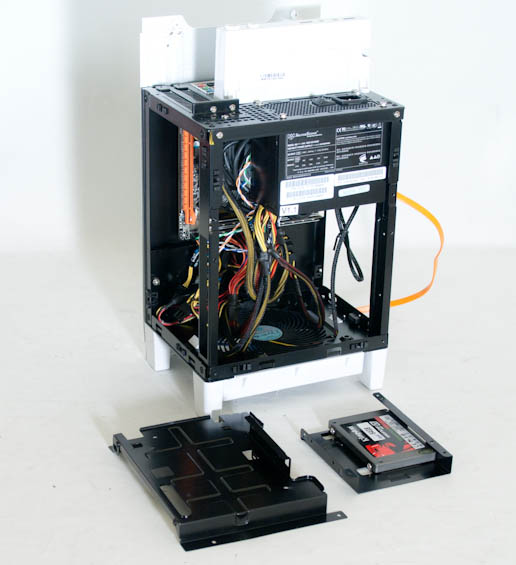
Where things do get tricky is the optical drive tray and associated 3.5" and 2.5" cages. There's an additional 2.5" cage mounted to the motherboard tray that can be removed but we opted not to use it, instead employing the "stacked" trays for the 3.5" and 2.5" drives that sit under the optical drive tray. The problem is that it's never 100% clear how these trays come together, but the key is to look for the three notches that the 3.5" tray uses to slide into the bottom of the 2.5" tray. Once you've installed a slimline drive (or not), you can replace the optical drive tray. Mount the 2.5" tray to the bottom of the optical drive tray, then mount the 3.5" tray to the bottom of the 2.5" drive tray using the notches. Everything screws into place. Take care to orient the drives properly to make cabling as easy as possible.
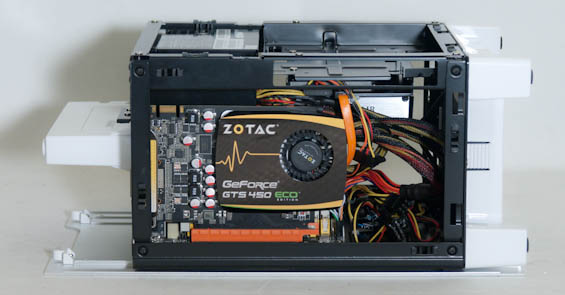
Finally, installing expansion cards is actually one of the easiest parts. The case is designed to accept the expansion cards last, and I was able to squeeze our Zotac GeForce GTS 450 Eco into the FT03 Mini without too much trouble. I will say that I'm still not a fan of having to remove a cover from the expansion slots before removing the slats from the slots themselves to install the card, but I'm also not sure if there's any other way to really handle it, especially with a case like this one.
With all the doors snapped back on in the proper order, the FT03 Mini is ready to go. There's even a small notch under the case's I/O for routing the power cable out the top of the case. It might seem a little sloppy to have all of the cabling spilling out from a single point in the top of the case, but that's how the original FT03 worked and as I mentioned before, you'll already know if the FT03 Mini interests you just by looking at it. That it comes together pretty easily is almost secondary to that fact.
Originally published at https://www.anandtech.com/show/5848/silverstone-ft03-mini-review-well-make-you-fun-size (Wayback Machine).