
Intel Z77 Motherboard Review with Ivy Bridge - ASRock, ASUS, Gigabyte, and MSI
ASRock Z77 Extreme4 – BIOS
The ASRock graphical BIOS has evolved from the initial days of Sandy Bridge into a bright blue screen with options we see below. With a graphical BIOS, there are two things to focus on – presentation and usability. Not by any great stretch of the imagination, one could design a great BIOS for everyone to use – with an infinite color palette and tools it could look amazing. However implementing such a system could be tricky, as a BIOS is currently limited to approximately eight megabytes in size. This has to contain all the initialization parameters for the board, as well as all the BIOS options we get to play with. I can imagine that should that limit ever increase to 16 or 64 MB, we would have a lot nicer things to look at.
I could wax lyrical about what I want in a BIOS, but as it currently stands, we will never get a work of art or functional awesomeness. ASRock make a fair attempt, one of the better ones in fact, and it turns out to be easy to use.

The main screen shows the BIOS version, CPU, memory and frequencies. What would put the cherry on the top would be the CPU voltage and temperatures as well. If there is room, perhaps some fan speeds (similar to ASUS’ EZ mode) should also be included. The main screen also has a system browser element, which is a top down view of the board with details on what is plugged in.
Overclocking options are essentially all bunched in one list in the OC Tweaker menu:


Important options like the CPU multiplier and BCLK are plain to see, as well as voltages and load line calibrations. The ASRock BIOS had no issues in applying the XMP settings on my G.Skill DDR2-2400 kit of memory.
The Internet Flash utility is something new to consumer level BIOSes – ASRock implements this in their Advanced Menu. If your motherboard is linked via Ethernet to the internet (thus on a network, or via ICS), then it will probe the ASRock servers for the latest BIOS. It will then be downloaded and applied without hassle. I really like this feature – it makes my life a lot easier at least!

Fan settings are all controlled in the H/W Monitor screen. This shows temperatures, voltages and fan speeds, and gives options for the various fan headers on-board. The main issue I have with ASRock fan options is the fact that they are not clear. We should have all our options regarding temperatures and target temperatures – instead we get a ‘Level’ system. This means that ASRock should probably invest in better fan controllers so they can talk back to the system regarding RPM, temperatures and relating these all to sensors on-board.


Software
ASRock’s software has not changed in any major detail since their last outing on X79. At the heart of the system is ASRock eXtreme Tuning Utility (AXTU), which controls OS overclocking, fan controls, energy saving and XFast RAM. XFast RAM itself allows 32-bit OS users to unlock memory not found, or 64-bit users to enable a RAMDisk to speed up certain caching utilities in the operating system.

Also from ASRock is the XFast LAN software, which in fact is a licensed version of cFosSpeed with ASRock decals. This software allows full management of the network facilities on the motherboard – shaping traffic for different functions as well as monitoring tools amongst others.
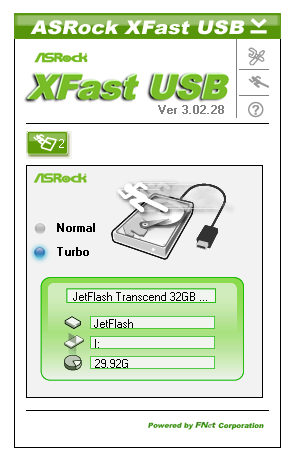
XFast USB is another of ASRock’s licensed software bundled with each motherboard. This utility will change the driver from the standard Windows one to one that can implement BOT (Bulk-Only Transfer) protocols. In reality, this allows for quicker transfers due to less overhead, at the expense of latency. For bulk transfers, I find that this utility works really well, especially with incompressible transfers. The downside being that it is only applied to one USB port at a time.


Originally published at https://www.anandtech.com/show/5793/intel-z77-motherboard-review-with-ivy-bridge-asrock-asus-gigabyte-and-msi (Wayback Machine).