
P67 $190 Part 2: MSI P67A-GD65, ASRock P67 Extreme6 and ECS P67H2-A2
ASRock P67 Extreme6: UEFI
After looking at a variety of Cougar Point boards sporting the graphical version of the UEFI interface, ASRock’s implementation is simple but effective. It varies little from the Extreme4, except for various UEFI updates since January which have been applied across the ASRock product range.
One point that bugged me with the UEFI is that when attempting to update the UEFI version via a USB stick, it can only access FAT12/FAT16/FAT32 file systems. This required me to reformat a stick to the FAT32 file system—it would be helpful if NTFS was supported in this regard.
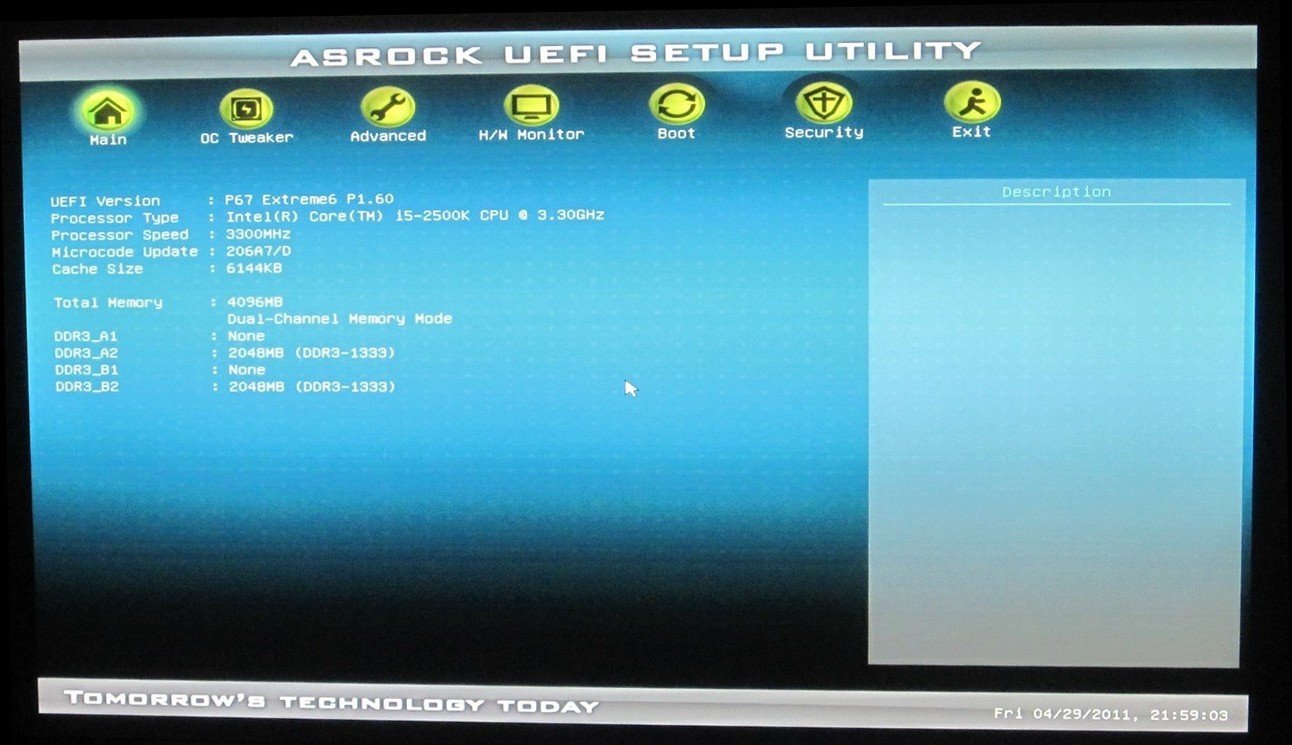
Thankfully the first screen tells us some information—UEFI version, processor, processor speed and the memory in the memory slots (you will see the ECS BIOS doesn’t offer this on the front screen). In terms of OC options, these are all contained in the OC Tweaker menu.

One option that has appeared since the P67 release is the ‘Internal PLL Overvoltage’. The reason this is present in some UEFI now is that during initial release and testing, various overclockers that were armed with an Intel board noticed that selecting the option allowed a significantly larger maximum overclock. Some manufacturers then started to release public BIOSes/UEFIs with this option available—other manufacturers are releasing beta BIOSes/UEFIs with this option only. In my own testing, I can get an extra 200-300 MHz peak on a 2600K using water cooling, but I wouldn’t necessarily be pushing it that far for daily usage.
The other options are similar to the P67 Extreme4, including the optimized CPU OC settings, offering 4.0 GHz to 4.8 GHz in 0.2 GHz intervals. These all bump up the multiplier and the power limits of the CPU, and results of these options are given in the overclocking section below, but overall these work quite well.
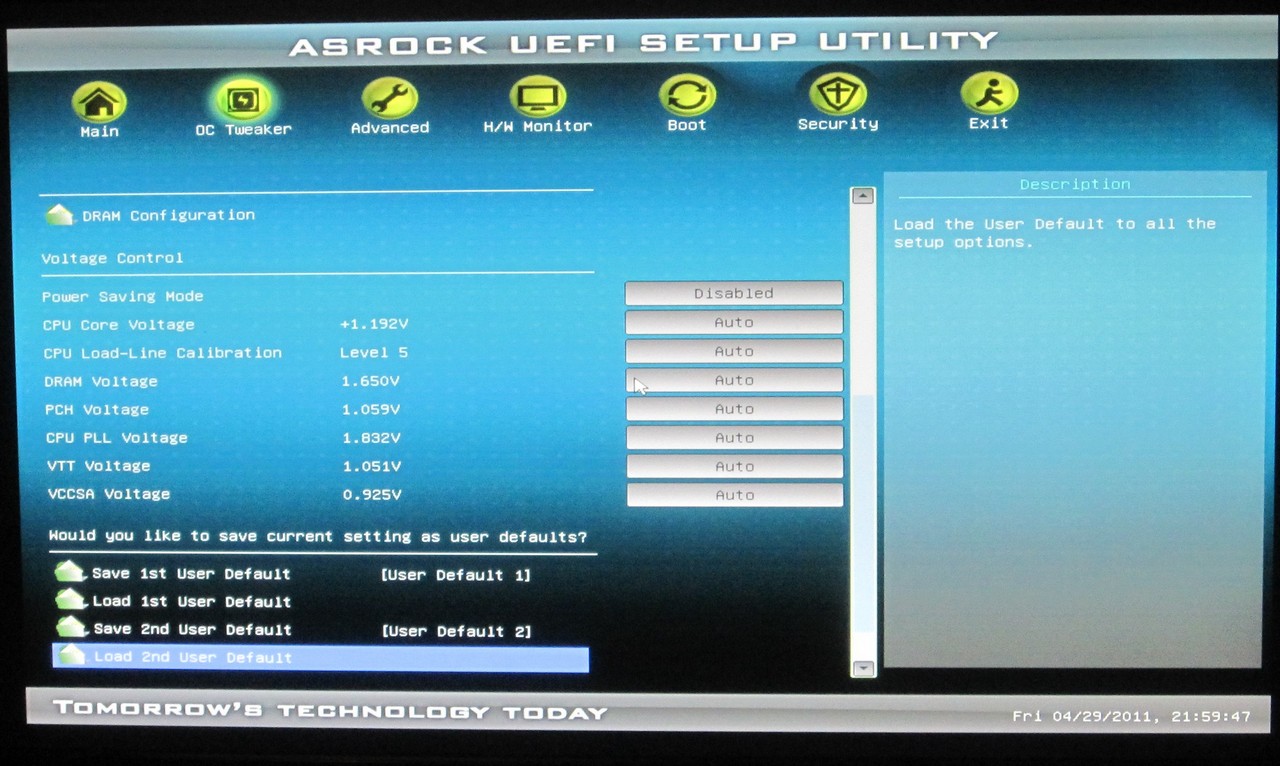
Voltage options here are menu based—there are no options to input voltages manually with number buttons. This may be me being picky, but it’s an option that could be easily implemented to appease everyone. Alongside this, ASRock allow you to save three UEFI profiles.
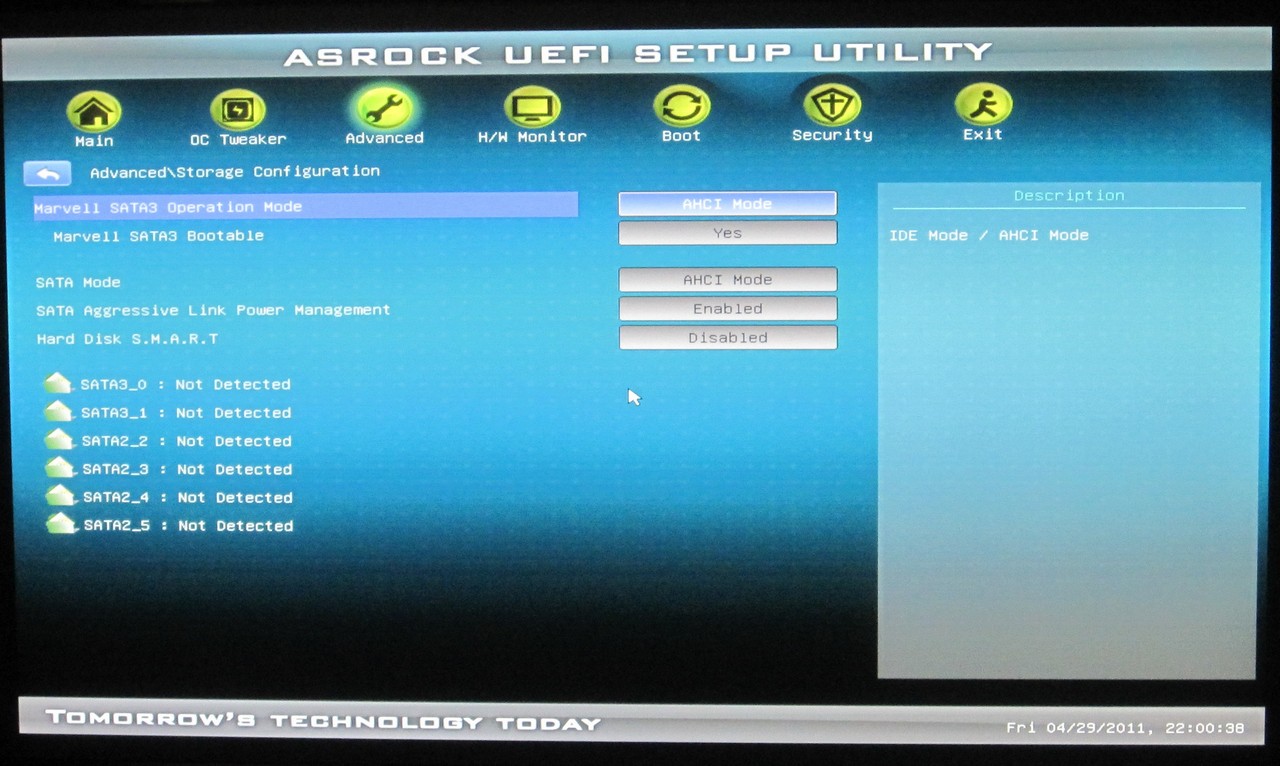
In the storage options, the two Marvell controllers can only be jointly turned off and on—there’s no option to select one or the other. This motherboard defaults the SATA controllers (PCH and Marvell) to IDE mode rather than AHCI, so bear this in mind if you have to press that reset CMOS button and install the OS in AHCI mode, as the board will fail to load into the OS. Also by default, the Marvell based SATA ports are not bootable—this decreases boot time by 5-10 seconds as these do not need to be pre-initialized before the boot sequence. If you want to boot from the Marvell SATA 6 Gbps ports rather than the PCH SATA 6 Gbps ports, expect a longer boot time.

The fan settings are accessible from the H/W Monitor menu—both CPU fans have one control, and the chassis fans are controlled independently. There is no option to control the PWR fan header, however.


ASRock P67 Extreme6: Overclocking
To start with the overclocking, the Auto OC options in the UEFI were tested. This option seems to change the multiplier and the power limit options only—the voltage of the CPU is left at Auto and is seemingly decided at boot time. Amazingly, all these options worked (remember, the Extreme4 didn’t like 4.8 GHz), with 4.4 GHz giving 1.336 V at load, 4.6 GHz giving 1.408 V at load and 4.8 GHz giving 1.440 V at load, peaking at 53ºC on the Corsair H50 cooling. This indicates good tuning and capability on behalf of ASRock.
Setting everything back to default and manually selecting the 48x multiplier resulted in a ‘Machine Check Error’ on booting. Changing the voltage from Auto to 1.42V fixed made the machine boot, giving 1.440V on load. At 49x multiplier, the board did not boot, and I wasn’t prepared to up the voltage any further. Changing the power options to 150 W / 130 W for short/long times also didn’t let the board boot into the OS.
Going back to 48x and playing with the BCLK was a rather fruitless exercise. This chip can do 105 MHz BCLK, as seen on H67, but the ASRock had trouble with 101.5 MHz. 100.5 MHz did boot into OS though. Even at 47x, above 100.5 MHz did not boot.
Ultimately, the 4.8 GHz Auto OC option here seems the best way to go. The board actually defaults the BCLK to 99.8 MHz rather than 100.0 MHz, meaning that 48x multiplier gives 4790.4 MHz in the OS on both single and multi-threaded load.
Using the AXTU software in Windows for overclocking didn’t do much—manually setting the multiplier in the software required a reboot to work, but changing the BCLK didn’t do anything. It’s a shame they don’t offer the Auto OC options given in the UEFI in this software.
For the 4.8 GHz OC results using the 3D Movement benchmark,
- In single threaded mode, for a 29.7% OC (from 3700 MHz to 4800 MHz), a 33.5% increase in the score was observed (110.60 to 147.70).
- In multi threaded mode, for a 41.2% OC (from 3300 MHz to 4400 MHz), a 40.9% increase in the score was observed (345.25 to 486.5).
Originally published at https://www.anandtech.com/show/4323/p67-190-part-2-msi-asrock-and-ecs (Wayback Machine).