
Dell 2707WFP: Looking for the Middle Ground of Large LCDs
- Posted in
- Displays
Appearance and Design
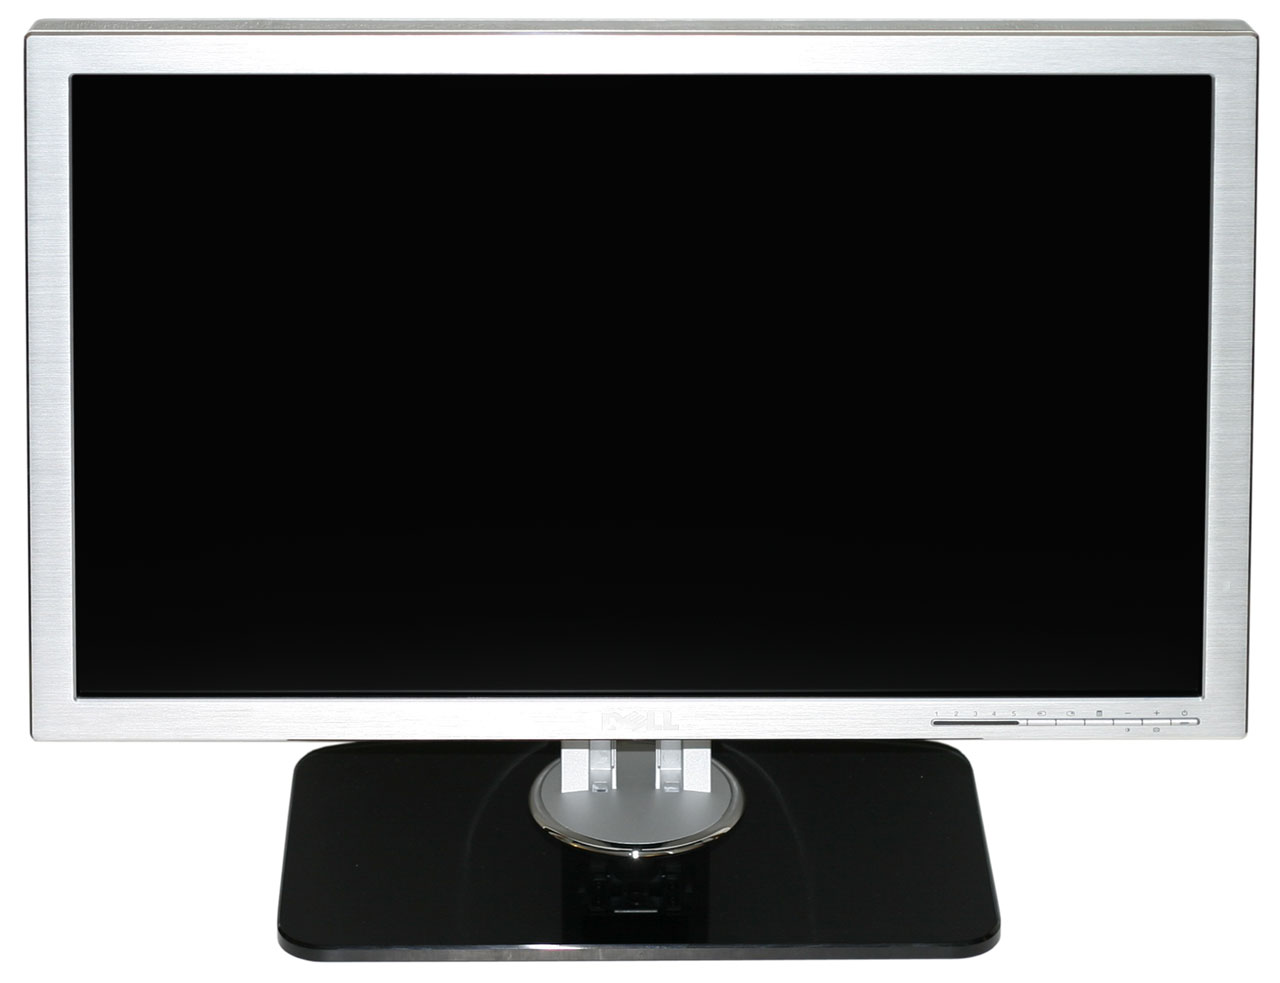
If you've seen/used any of Dell's other LCDs, the difference in appearance and styling of the 2707WFP is immediately noticeable. Gone are the black bezels and silver base stand. In their place we have a brushed aluminum bezel, a base stand with a black mirror finish, and various chrome highlights. Opinions on aesthetics will vary by individual, but we certainly like the new styling of this LCD.
Like the 2407WFP, the bottom right corner on the front of the LCD has six buttons. The left button switches among the various input options, and the next button controls the picture-in-picture settings. The middle button accesses the on-screen display (OSD) and also functions as the select button within the OSD. The next two buttons are for left/up/decrease and right/down/increase, and on the far right is the power button. The power button also glows blue when the LCD is on or orange when the display is in sleep mode. To the left of the six buttons are five LEDs that indicate the active input, although these LEDs only light up during the input select process and are otherwise off.
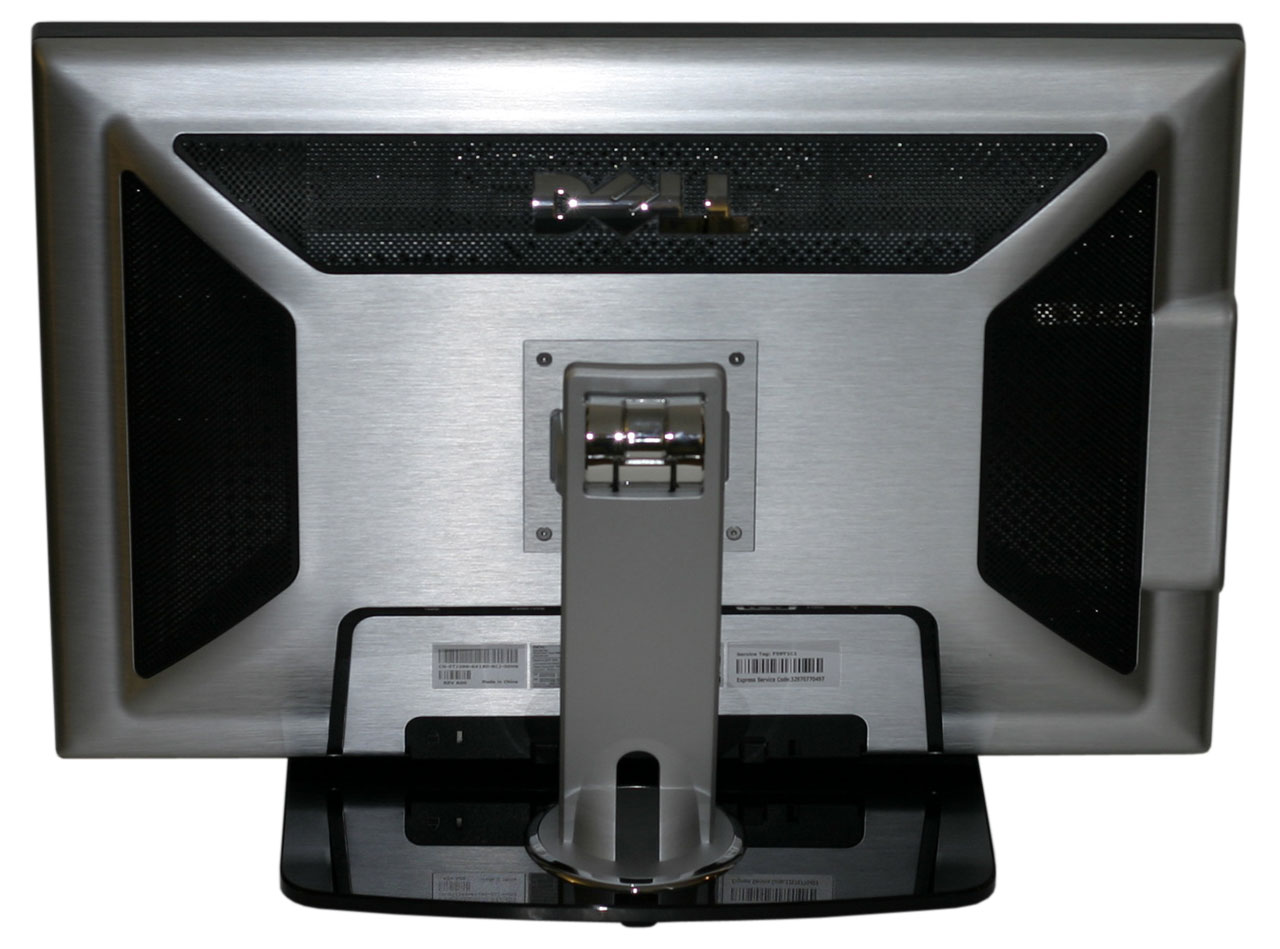
The rear of display continues the silver brushed aluminum finish, with black ventilation areas on the sides and top. You can also get a better view of the base stand here, and the highly reflective finish is obvious. Fingerprints can be a problem, but Dell conveniently includes a nice nonabrasive cloth to help keep things clean. Unlike many other LCDs, the 2707WFP comes fully assembled. If you want to remove the base stand, you'll have to remove the four T10 Torx screws, at which point you can access the standard VESA wall mount.
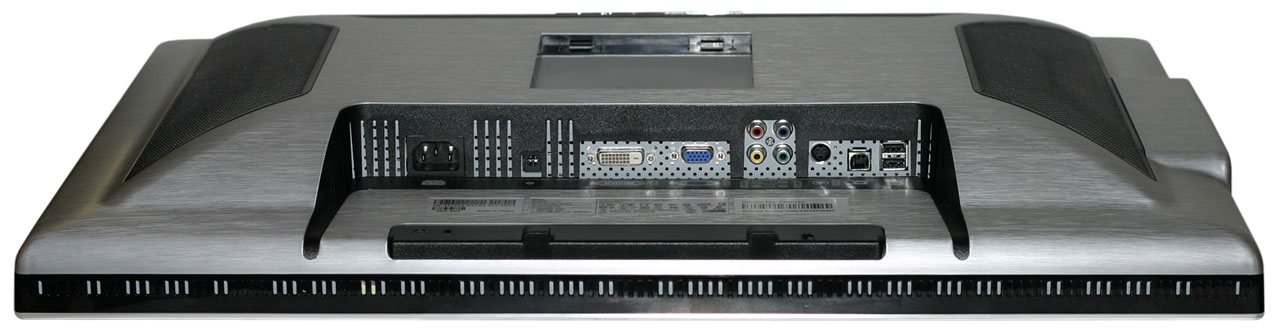
Above is a shot of the rear of the unit without the base stand installed. The lower image shows the input ports, as well as two of the extra USB ports. To the right of power socket you can see a power connector for the optional AS501 speaker bar attachment. It's the same model as the 2407WFP uses, although it's interesting that the 2407WFP specifically lists speaker accessories during the configuration process while the 2707WFP does not. That's an oversight of the configurator that could use correcting, although for Dell PCs this is not an issue.
Here you can see the left side of the panel with the flash memory readers and the other two USB ports. You can also see the tilt mechanism in full swing, ranging from a 5° forward tilt to a 30° backwards tilt. The mounting arm of the base stand is quite a bit different than other Dell LCDs, apparently going for something of a "chrome robot" theme. [Ed: Someone actually mentioned Robocop during the course of our evaluation.] However, while the base stand looks different from most other LCDs, it still functions quite well.
The base stand also helps with minimizing cable clutter by providing for cable routing. A black plastic cover can be removed from the mounting arm, and then you can feed the various cables that you plan on using through the slot in the base stand. After that's done, simply slide the black cover back into place. You'll want to provide a bit of slack on the cables, but as a whole the cable routing works quite well.
If you've seen/used any of Dell's other LCDs, the difference in appearance and styling of the 2707WFP is immediately noticeable. Gone are the black bezels and silver base stand. In their place we have a brushed aluminum bezel, a base stand with a black mirror finish, and various chrome highlights. Opinions on aesthetics will vary by individual, but we certainly like the new styling of this LCD.
 |
 |
| Click to enlarge | |
Like the 2407WFP, the bottom right corner on the front of the LCD has six buttons. The left button switches among the various input options, and the next button controls the picture-in-picture settings. The middle button accesses the on-screen display (OSD) and also functions as the select button within the OSD. The next two buttons are for left/up/decrease and right/down/increase, and on the far right is the power button. The power button also glows blue when the LCD is on or orange when the display is in sleep mode. To the left of the six buttons are five LEDs that indicate the active input, although these LEDs only light up during the input select process and are otherwise off.
 |
 |
| Click to enlarge | |
The rear of display continues the silver brushed aluminum finish, with black ventilation areas on the sides and top. You can also get a better view of the base stand here, and the highly reflective finish is obvious. Fingerprints can be a problem, but Dell conveniently includes a nice nonabrasive cloth to help keep things clean. Unlike many other LCDs, the 2707WFP comes fully assembled. If you want to remove the base stand, you'll have to remove the four T10 Torx screws, at which point you can access the standard VESA wall mount.
 |
 |
| Click to enlarge |
Above is a shot of the rear of the unit without the base stand installed. The lower image shows the input ports, as well as two of the extra USB ports. To the right of power socket you can see a power connector for the optional AS501 speaker bar attachment. It's the same model as the 2407WFP uses, although it's interesting that the 2407WFP specifically lists speaker accessories during the configuration process while the 2707WFP does not. That's an oversight of the configurator that could use correcting, although for Dell PCs this is not an issue.
 |
 |
| Click to enlarge | |
Here you can see the left side of the panel with the flash memory readers and the other two USB ports. You can also see the tilt mechanism in full swing, ranging from a 5° forward tilt to a 30° backwards tilt. The mounting arm of the base stand is quite a bit different than other Dell LCDs, apparently going for something of a "chrome robot" theme. [Ed: Someone actually mentioned Robocop during the course of our evaluation.] However, while the base stand looks different from most other LCDs, it still functions quite well.
 |
 |
| Click to enlarge | |
The base stand also helps with minimizing cable clutter by providing for cable routing. A black plastic cover can be removed from the mounting arm, and then you can feed the various cables that you plan on using through the slot in the base stand. After that's done, simply slide the black cover back into place. You'll want to provide a bit of slack on the cables, but as a whole the cable routing works quite well.
Originally published at https://www.anandtech.com/show/2204 (Wayback Machine).