
Micro-ATX Cases - Shoebox Showdown
- Posted in
- Cases/Cooling/PSUs
PC Design Lab Qmicra - Interior Cont'd
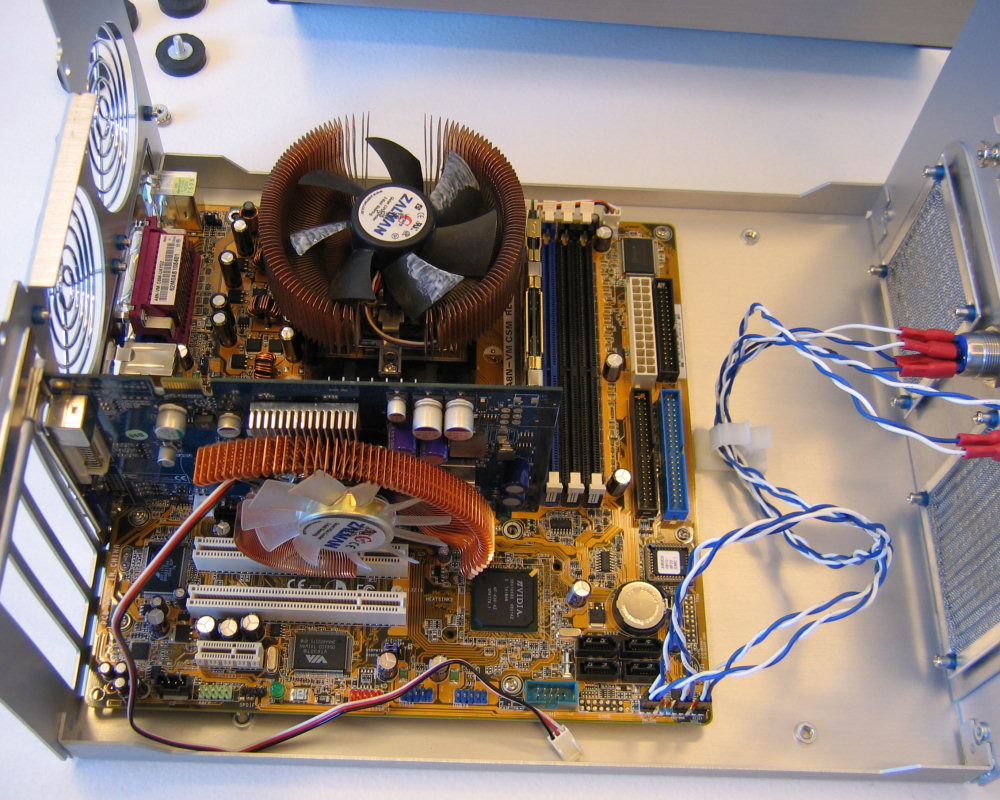
With the ease of access that we had with the Qmicra, the motherboard and video card installation of our new test bed was entirely uneventful. Expansion cards are held in place with a removable clip secured with a pair of oversized thumbscrews, which certainly worked well compared to other tool-less designs we've seen.
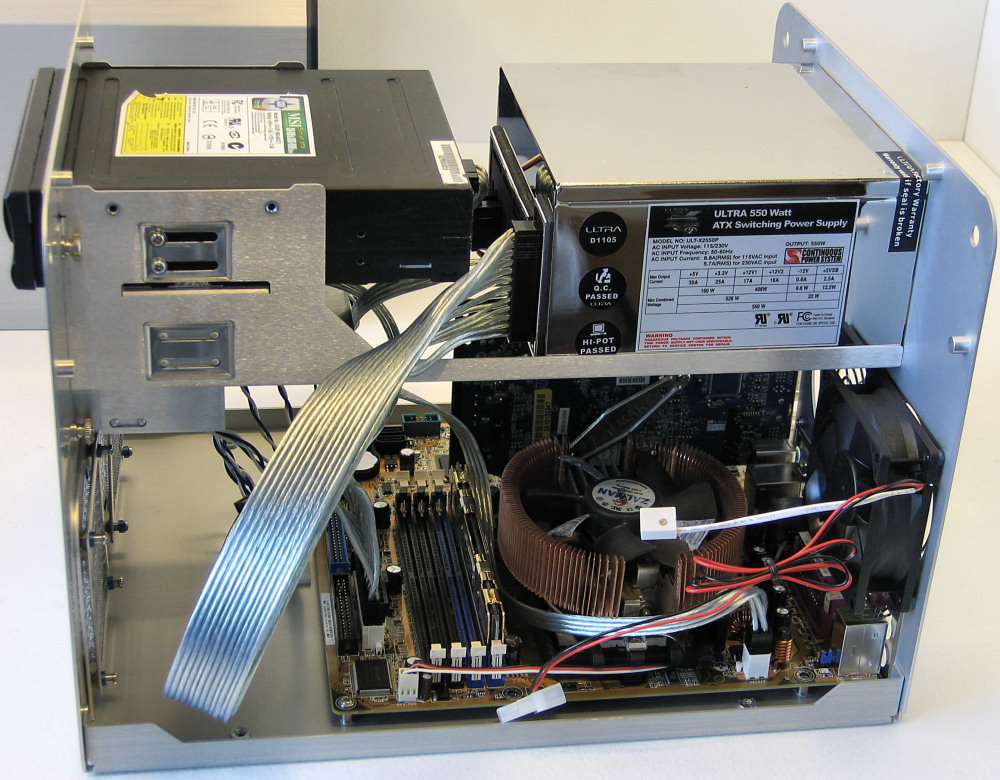
After putting in the motherboard, video card, and our single Antec Tri-cool 80mm fan for extra exhaust, we put the main bracket in and fastened the power supply and optical drive. Note that the testing on the unit was actually done with the Zalman power supply we've used in the past, even though the pictures were taken with our UltraX PSU.
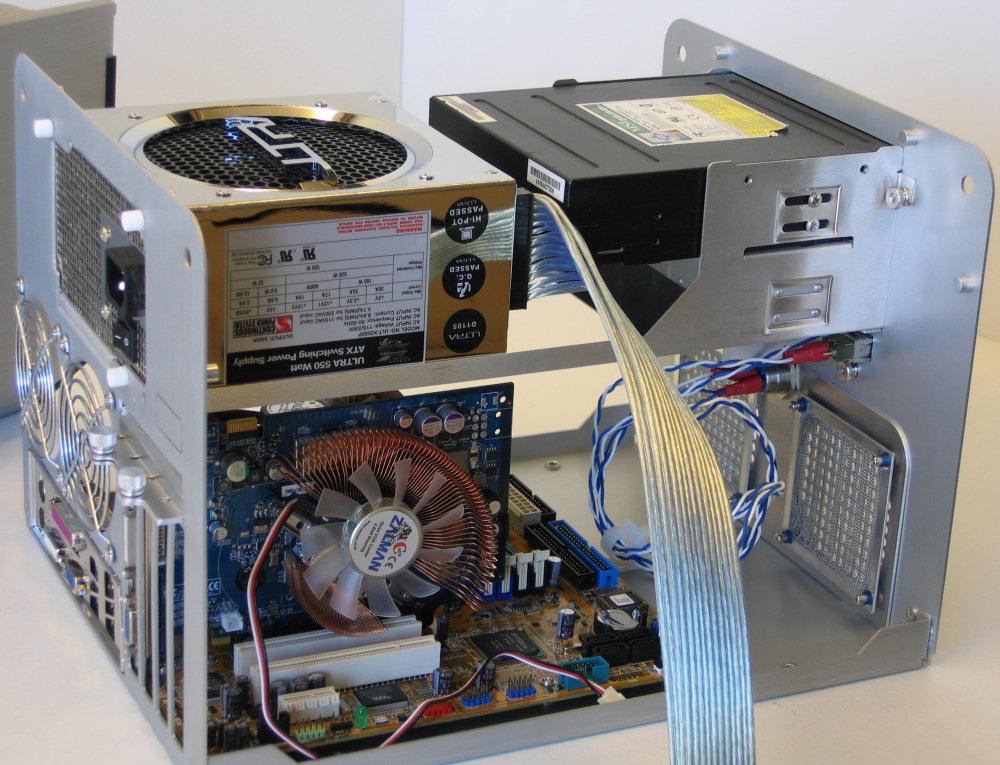
The fit is tight with a slightly larger than normal power supply (which is actually becoming pretty common with today's 500+ watt units being so popular), but it is still manageable as long as the optical drive isn't much longer than normal. Overall we do feel that making the case just a centimeter or so deeper wouldn't have affected anything negatively and would have made the list of usable PSU / Optical drive combinations much longer.
Modular supplies can be both a boon and a burden in the Qmicra, since there could be clearance issues with either one in a worst-case scenario. On the other hand, there's the prospect of less cable clutter with a modular supply, since it's pretty much a guarantee that one would never use all the power connectors in a non-modular PSU with a mATX setup.
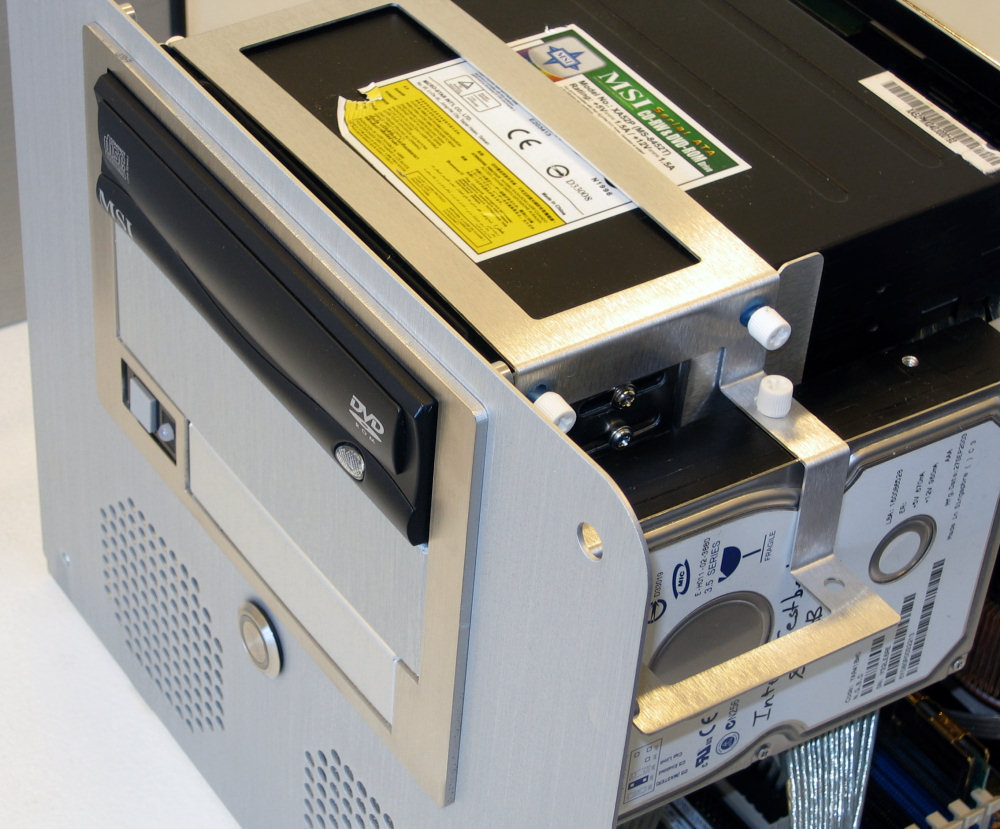
Keeping to a mostly tool-less philosophy, the next step of the installation process is accomplished via the use of more plastic and steel thumbscrews, and the specially designed hard drive bracket. The vertical hanging of the hard drives is not the most stable mounting system in the world, but there are two extra angled pieces for anchoring the drives from the bottom as well, and because of this layout the installation of each piece remains very easy.
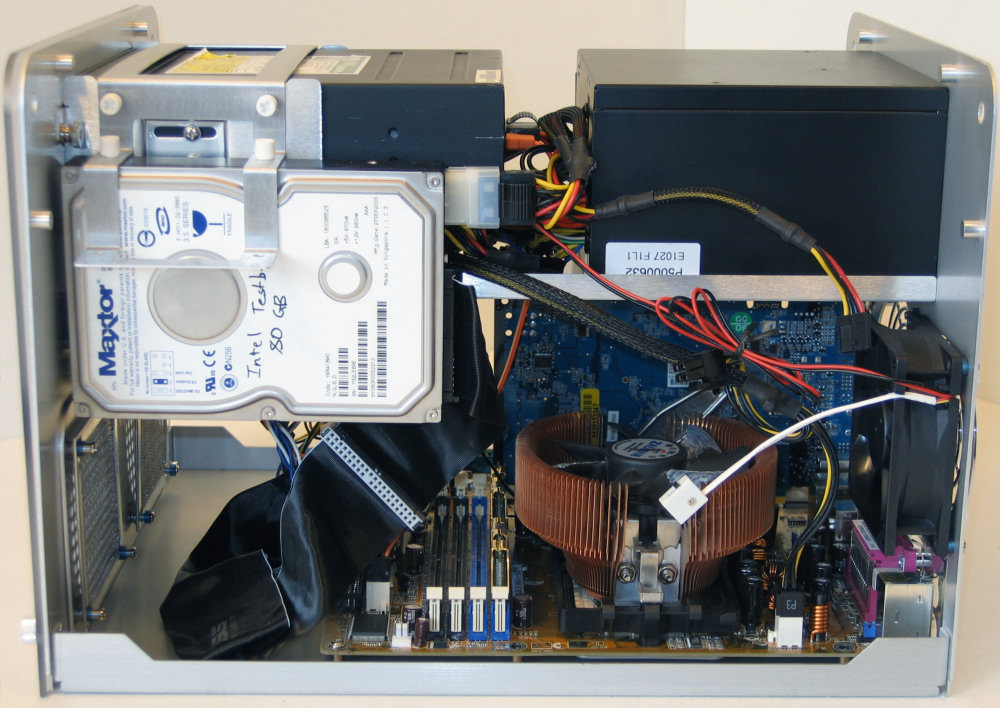
Once the hard drives are in and the cables are connected, our build in the Qmicra is pretty much done. Over the course of installing and reinstalling various parts in the case we never once had anything major to complain about with the design, layout, or craftsmanship. All the corners are nicely rounded, all the finishes are fingerprint resistant, and the fit and strength of everything is easily at the top of its class. This last picture here shows the actual system as it was right before testing, with the Zalman power supply.
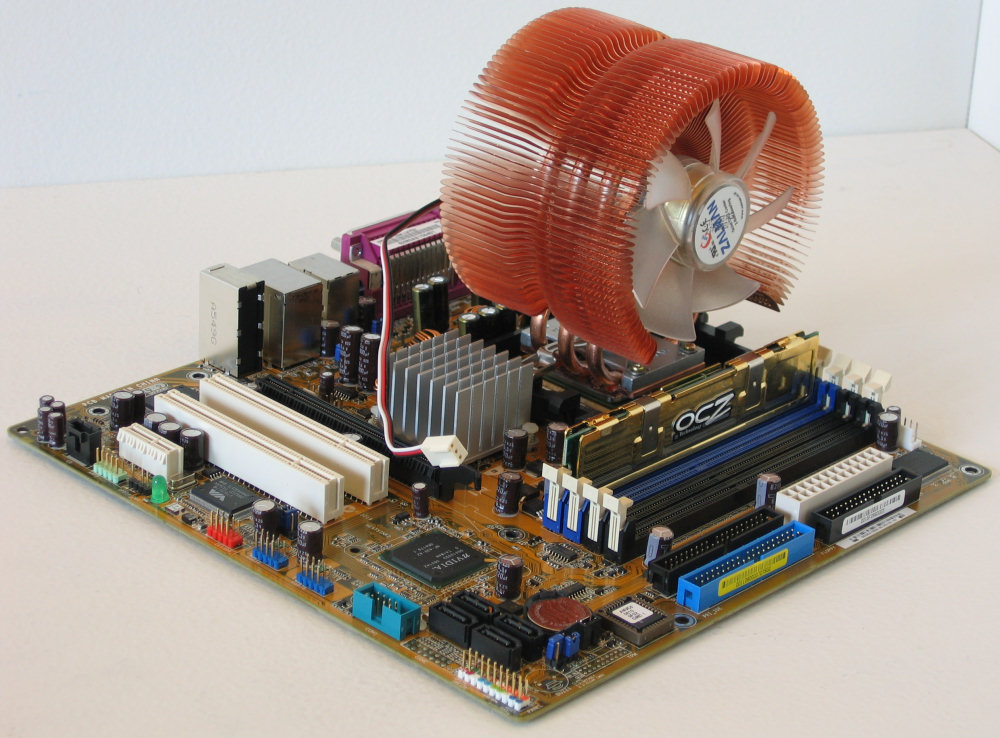
For a small form factor case, the Qmicra is very spacious to work in and a very large number of customizations and larger aftermarket parts could be accommodated, not to mention places to stuff the extra cables from non-modular PSUs. In particular, a water-cooling setup utilizing a dual 80mm fan radiator could be realized much easier thanks to the generous amount of space in the front, and some of the largest video cards available could be housed without issues (save for maybe having to sacrifice a hard drive or two). In our benchmarking we even tried using our CNPS 9500 CPU HSF as recommended by PC Design Lab, and it did fit (though just barely!).
The design is very unconventional, but that's not always a bad thing. The Qmicra is easily one of the most flexible micro-ATX designs we've ever encountered, and for anyone seriously considering a small SLI PC, this case should be able to handle it without problems. The excellent design does come with a cost however, as the Qmicra is priced almost three times higher than the other cases in this roundup, and that doesn't include a power supply like the other two units. Anyone looking for top quality of workmanship in a micro-ATX case should still seriously consider the Qmicra.
With the ease of access that we had with the Qmicra, the motherboard and video card installation of our new test bed was entirely uneventful. Expansion cards are held in place with a removable clip secured with a pair of oversized thumbscrews, which certainly worked well compared to other tool-less designs we've seen.
 |
| Click to enlarge |
After putting in the motherboard, video card, and our single Antec Tri-cool 80mm fan for extra exhaust, we put the main bracket in and fastened the power supply and optical drive. Note that the testing on the unit was actually done with the Zalman power supply we've used in the past, even though the pictures were taken with our UltraX PSU.
 |
| Click to enlarge |
The fit is tight with a slightly larger than normal power supply (which is actually becoming pretty common with today's 500+ watt units being so popular), but it is still manageable as long as the optical drive isn't much longer than normal. Overall we do feel that making the case just a centimeter or so deeper wouldn't have affected anything negatively and would have made the list of usable PSU / Optical drive combinations much longer.
 |
| Click to enlarge |
Modular supplies can be both a boon and a burden in the Qmicra, since there could be clearance issues with either one in a worst-case scenario. On the other hand, there's the prospect of less cable clutter with a modular supply, since it's pretty much a guarantee that one would never use all the power connectors in a non-modular PSU with a mATX setup.
 |
| Click to enlarge |
Keeping to a mostly tool-less philosophy, the next step of the installation process is accomplished via the use of more plastic and steel thumbscrews, and the specially designed hard drive bracket. The vertical hanging of the hard drives is not the most stable mounting system in the world, but there are two extra angled pieces for anchoring the drives from the bottom as well, and because of this layout the installation of each piece remains very easy.
Once the hard drives are in and the cables are connected, our build in the Qmicra is pretty much done. Over the course of installing and reinstalling various parts in the case we never once had anything major to complain about with the design, layout, or craftsmanship. All the corners are nicely rounded, all the finishes are fingerprint resistant, and the fit and strength of everything is easily at the top of its class. This last picture here shows the actual system as it was right before testing, with the Zalman power supply.
 |
| Click to enlarge |
For a small form factor case, the Qmicra is very spacious to work in and a very large number of customizations and larger aftermarket parts could be accommodated, not to mention places to stuff the extra cables from non-modular PSUs. In particular, a water-cooling setup utilizing a dual 80mm fan radiator could be realized much easier thanks to the generous amount of space in the front, and some of the largest video cards available could be housed without issues (save for maybe having to sacrifice a hard drive or two). In our benchmarking we even tried using our CNPS 9500 CPU HSF as recommended by PC Design Lab, and it did fit (though just barely!).
 |
| Click to enlarge |
The design is very unconventional, but that's not always a bad thing. The Qmicra is easily one of the most flexible micro-ATX designs we've ever encountered, and for anyone seriously considering a small SLI PC, this case should be able to handle it without problems. The excellent design does come with a cost however, as the Qmicra is priced almost three times higher than the other cases in this roundup, and that doesn't include a power supply like the other two units. Anyone looking for top quality of workmanship in a micro-ATX case should still seriously consider the Qmicra.
Originally published at https://www.anandtech.com/show/2147 (Wayback Machine).