
Micro-ATX Cases - Shoebox Showdown
- Posted in
- Cases/Cooling/PSUs
Antec Aria - Interior
Opening the Aria is a bit like taking apart a puzzle, with multiple interconnected parts and some areas being totally inaccessible until uncovered. That's not to say it's difficult though - the top and side panels all remove individually with only one thumbscrew holding the top in place before the clips which hold the side panels in can be undone.
After all the covers have been taken off, the drive cage can be slid backwards then lifted up and out. With this view we can now see why the case feels so sturdy - the frame is extremely thick for a unit this size, and it is strongly reinforced at the corners. You can also see just how shallow the custom PSU is, which is the only reason a case this small is capable of holding a standard 5.25" optical drive.
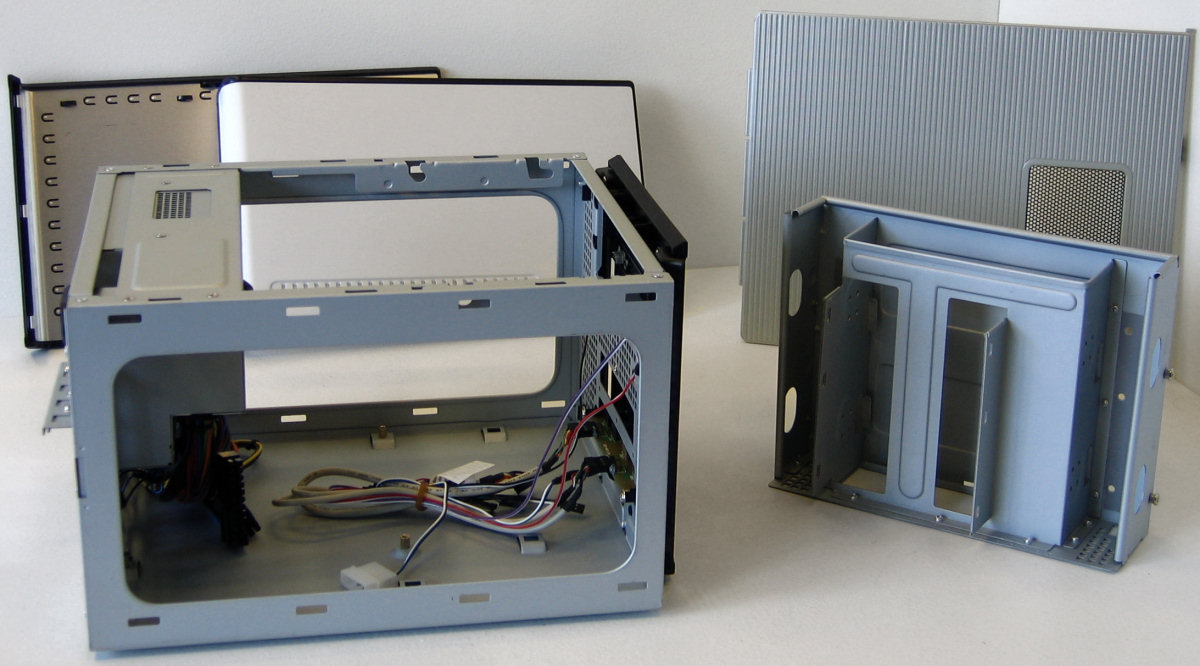
Here's a more holistic view of all the parts of the Aria, with the frame of the case being viewed from its left side and the drive cage from underneath with the front of it resting on the table. Getting the micro-ATX motherboard into the somewhat cramped frame isn't the easiest thing in the world, but if the PSU can be removed for a little extra clearance if necessary.
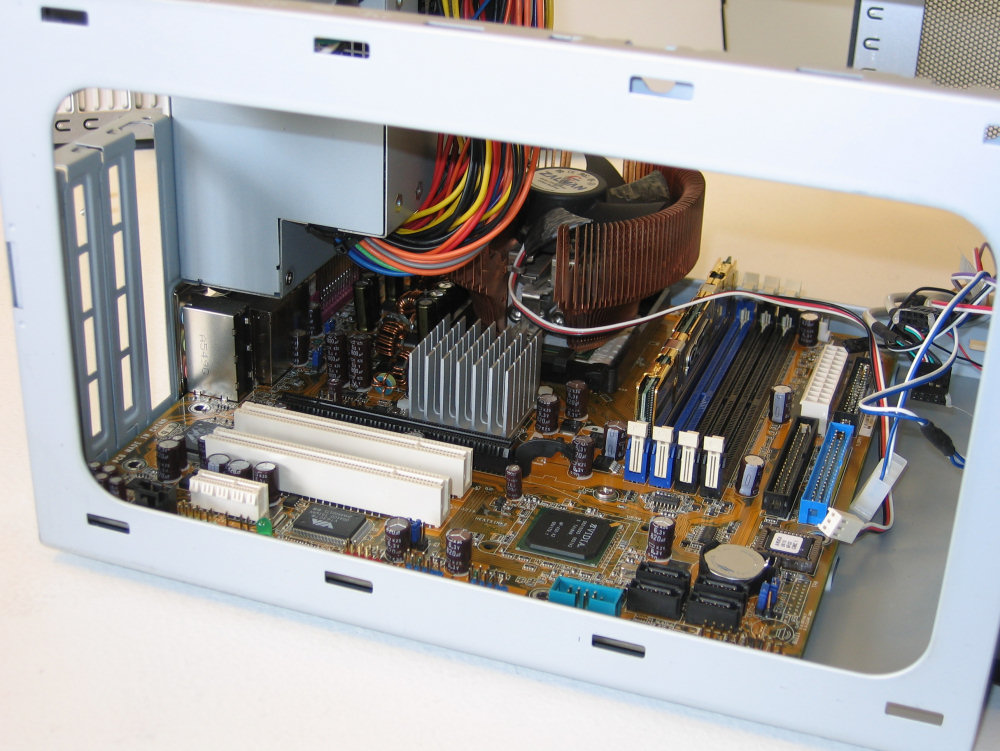
Considering there isn't any other permanently mounted active cooling elements to the case other than the PSUs, we really have to start seeing how parts fit into the Aria to look more closely at the design of the case. Here is the test bed's motherboard with a Zalman CNPS 7000 CU cooler installed to give an idea how tight a fit some parts can be.
Attaching cables and installing our 6600 GT required a little finagling, but was easy overall. Larger video cards could be a real problem for any case this small, and using all four expansion slots would likely push things too far, in terms of cooling.
Opening the Aria is a bit like taking apart a puzzle, with multiple interconnected parts and some areas being totally inaccessible until uncovered. That's not to say it's difficult though - the top and side panels all remove individually with only one thumbscrew holding the top in place before the clips which hold the side panels in can be undone.
 |
| Click to enlarge |
After all the covers have been taken off, the drive cage can be slid backwards then lifted up and out. With this view we can now see why the case feels so sturdy - the frame is extremely thick for a unit this size, and it is strongly reinforced at the corners. You can also see just how shallow the custom PSU is, which is the only reason a case this small is capable of holding a standard 5.25" optical drive.
 |
| Click to enlarge |
Here's a more holistic view of all the parts of the Aria, with the frame of the case being viewed from its left side and the drive cage from underneath with the front of it resting on the table. Getting the micro-ATX motherboard into the somewhat cramped frame isn't the easiest thing in the world, but if the PSU can be removed for a little extra clearance if necessary.
 |
| Click to enlarge |
Considering there isn't any other permanently mounted active cooling elements to the case other than the PSUs, we really have to start seeing how parts fit into the Aria to look more closely at the design of the case. Here is the test bed's motherboard with a Zalman CNPS 7000 CU cooler installed to give an idea how tight a fit some parts can be.
 |
| Click to enlarge |
Attaching cables and installing our 6600 GT required a little finagling, but was easy overall. Larger video cards could be a real problem for any case this small, and using all four expansion slots would likely push things too far, in terms of cooling.
 |
| Click to enlarge |
Originally published at https://www.anandtech.com/show/2147 (Wayback Machine).