
Micro-ATX Cases - Shoebox Showdown
- Posted in
- Cases/Cooling/PSUs
Ultra MicroFly - Interior Cont'd
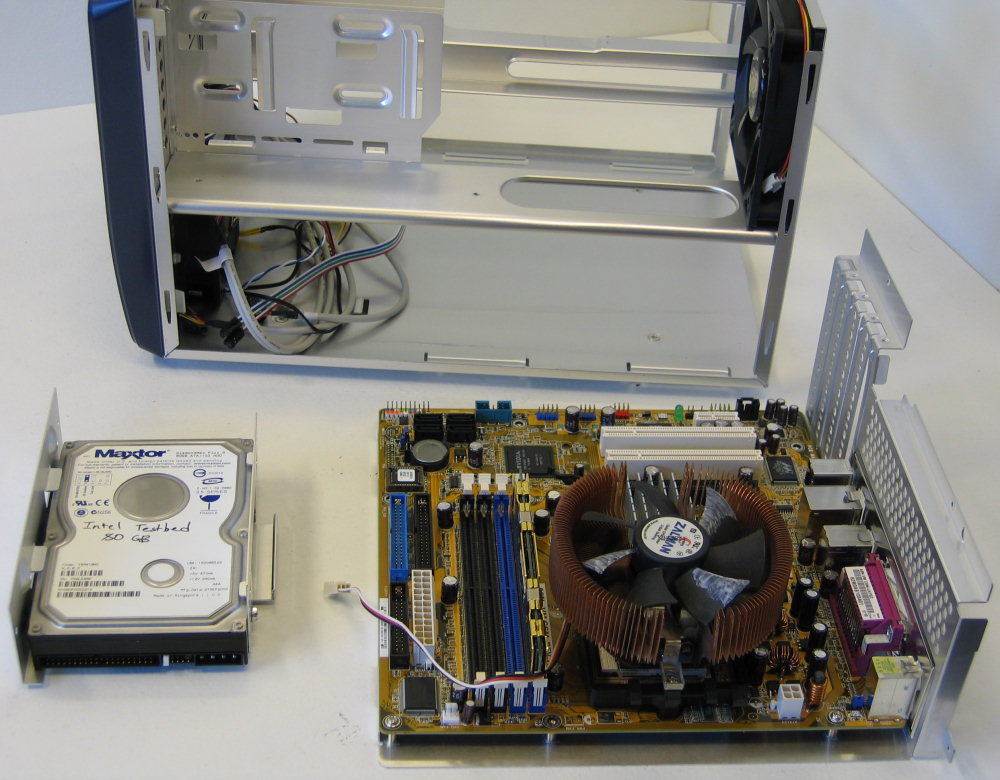
Our first step with the MicroFly's install was putting the hard drive and assembled motherboard into their respective trays.
Like the other clones of this case, the MicroFly just barely works with our CNPS 7000 Cu cooler.
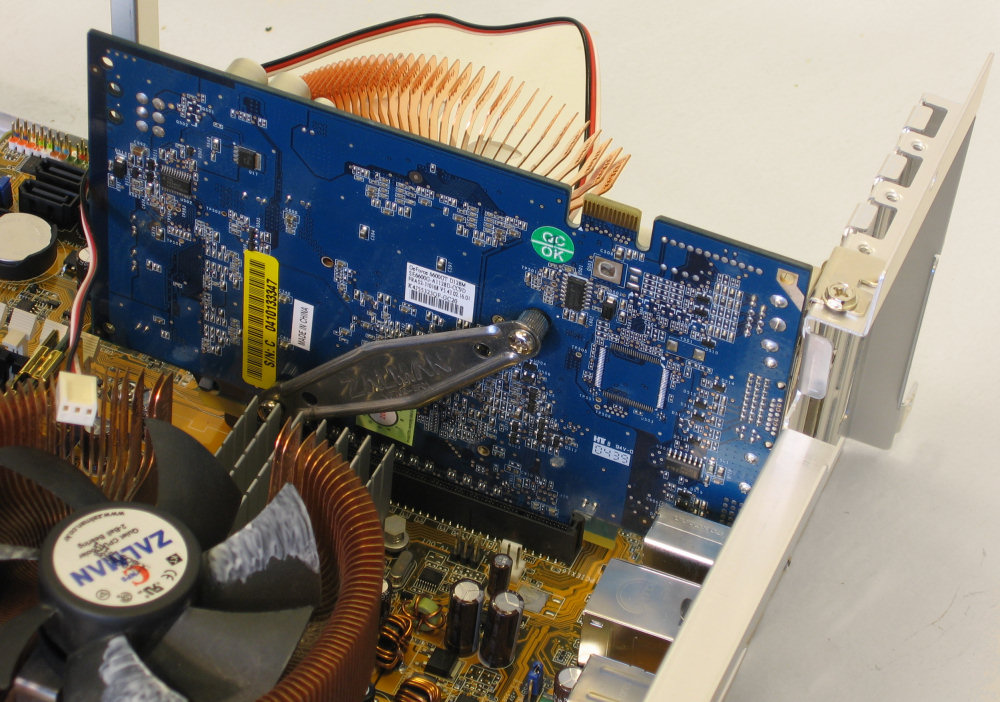
After making sure our CPU cooler would fit, we attached the video card with the single standard case screw and slid the completed motherboard tray into the case all the way. The largest video cards could be difficult to squeeze into the MicroFly, but it handles them better than the Aria.
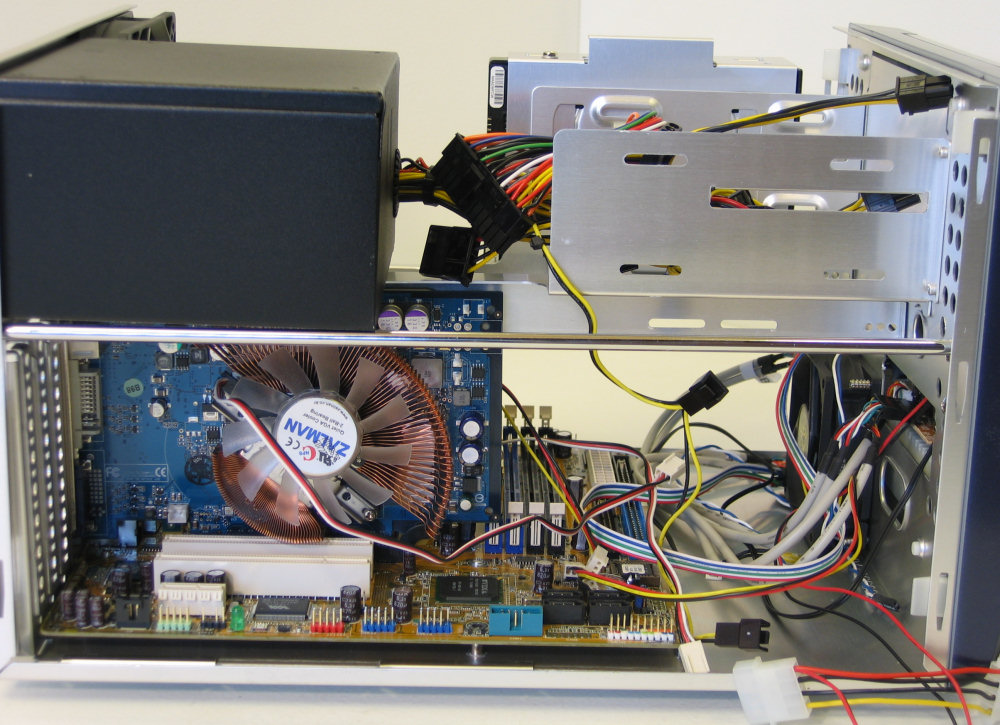
The included power supply has enough wires for most anything you could fit inside the case, including two 12 volt fan headers
Our completed build from the right side. Like the other cases, there is still a little room for extra equipment in the front bottom, but unlike them there's actually a little space next to the PSU too, so with a little creativity a specialized water-cooling setup could be realized in this case as well.
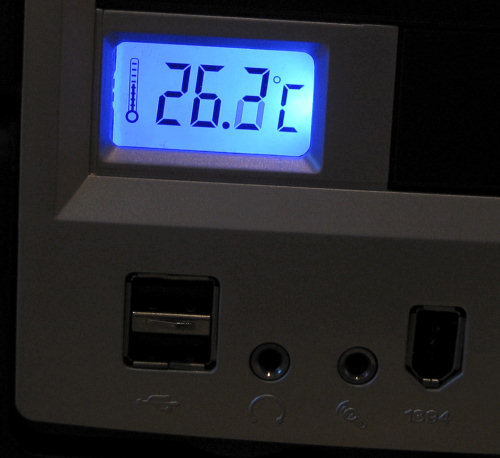
The LCD display on front shows the temperatures detected by the remote sensor which we attached loosely to our Zalman CPU cooler.
There isn't a whole lot to set the Ultra MicroFly apart from other similar micro-ATX cases, but it still represents a well-designed unit. The low cost of entry is definitely one of the most attractive aspects, and as a whole setting up and using the Ultra MicroFly was uneventful. As you'll see in a moment, the overall performance characteristics of the MicroFly are impressive, with the only potential blemish being slightly higher noise levels at full load.
Our first step with the MicroFly's install was putting the hard drive and assembled motherboard into their respective trays.
 |
| Click to enlarge |
Like the other clones of this case, the MicroFly just barely works with our CNPS 7000 Cu cooler.
 |
| Click to enlarge |
After making sure our CPU cooler would fit, we attached the video card with the single standard case screw and slid the completed motherboard tray into the case all the way. The largest video cards could be difficult to squeeze into the MicroFly, but it handles them better than the Aria.
 |
| Click to enlarge |
The included power supply has enough wires for most anything you could fit inside the case, including two 12 volt fan headers
 |
| Click to enlarge |
Our completed build from the right side. Like the other cases, there is still a little room for extra equipment in the front bottom, but unlike them there's actually a little space next to the PSU too, so with a little creativity a specialized water-cooling setup could be realized in this case as well.
 |
| Click to enlarge |
The LCD display on front shows the temperatures detected by the remote sensor which we attached loosely to our Zalman CPU cooler.
There isn't a whole lot to set the Ultra MicroFly apart from other similar micro-ATX cases, but it still represents a well-designed unit. The low cost of entry is definitely one of the most attractive aspects, and as a whole setting up and using the Ultra MicroFly was uneventful. As you'll see in a moment, the overall performance characteristics of the MicroFly are impressive, with the only potential blemish being slightly higher noise levels at full load.
Originally published at https://www.anandtech.com/show/2147 (Wayback Machine).