
Canon PowerShot SD300: The Best Ultra-Compact in its Class?
- Posted in
- Digital Camera
Playback Features
If the camera is already in a record mode, you can switch to playback mode by sliding the Mode Switch to Play. With the unit off, you can power up the camera in play mode without extending the lens. To browse through images/videos, press left/right on the 4-way controller.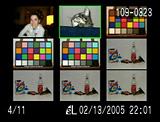 Image thumbnail view |
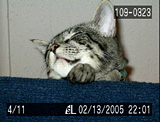 Image regular view |
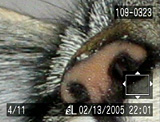 Image magnified |
An image can be magnified in 10 increments by pressing the zoom controller towards the telephoto end. While an image is magnified, you can move to different areas of the picture by using the 4-way controller. We found this process to be very smooth and fast. To fit the image back to screen, you can press the Menu button. To view a thumbnail screen with 9 images, press the zoom controller toward the wide end. If you press toward the wide end again, you can scroll through sets of images 9 at a time. To delete a single image, press down on the 4-way controller. A dialog will appear to confirm your decision.
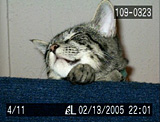 No Info. |
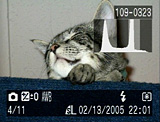 Info. |
 Detailed Info. |
By pressing the Disp. button, you can cycle through three different displays. The default display only shows the image with no information to accompany it. By pressing the Disp. button, the following information will appear: file number, number of picture out of total on card, resolution, quality, date, and time. Another press of the Disp. button will add the following information to the display: record mode, exposure compensation, white balance, flash, metering, macro/infinity, and a histogram.
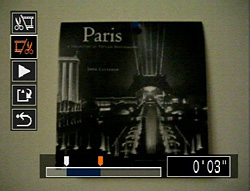
Edit movie screen
By pressing the Menu button, the following options will be displayed:
| Play Menu | |
| Protect | Select |
| Rotate | Select, Rotate |
| Sound Memo | Record, Play, Delete |
| Erase All | Cancel, OK |
| Slide Show | Program: (All images, Show 1 -3), Play Time (Manual, 3 - 10, 15, 30 sec.) Repeat (On, Off) |
| Print Order | Order (Select) |
| Set up: Print Type (Standard, Index, Both), Date (On, Off), File No. (On, Off) | |
| Reset | |
| Transfer Order | Order (Select), Reset |
The Protect option allows you to mark images as protected so that they cannot be erased accidentally. Formatting the SD card, however, will erase all images even if they are protected. With the Sound Memo option, you can record audio clips to go along with your pictures. The audio clips are recorded as WAV files with the same file number as the picture. The maximum recording length is 60 seconds. By selecting images in the Print Order section, you can specify images for printing on a DPOF-compatible printer. You have the option to print an index as well as to stamp the date and/or file number on your pictures. With the Transfer Order option, you can specify which images the camera should transfer when it is connected to a computer. The pictures will be transferred in the order in which they were taken (oldest first).
Originally published at https://www.anandtech.com/show/1623 (Wayback Machine).