
Konica Minolta DiMAGE Z2 & Z3: What is the difference in performance?
- Posted in
- Digital Camera
Playback Features
To view recently taken pictures, there are a few options. If you continue to hold down the shutter button after taking a picture, the picture will remain on the LCD/viewfinder until you release the button. While you are in record mode, you can also press the QV/Delete (Quick View/Delete) button or slide the "mode switch" to play to switch to a playback screen. In QV mode, however, you do not have access to the playback menu. QV and playback modes are similar in that you can do the following: delete pictures, rotate pictures, view extra info., view images as thumbnails, and magnify images. In both modes, pressing the QV/Delete button brings up a message confirming your request to delete the current picture. Pictures can be rotated in-camera by pressing the down button. Pressing the up button changes the regular playback screen from one with basic information (including time, date, resolution, quality, and image number) to one with added information (including a histogram, shutter speed, f-stop, E.C., white balance, ISO, and folder name). The i+ button changes the screen to one of 3 displays: one with basic information over the picture, one with no information, and a thumbnail page with 6 small images. Images can be magnified on the screen by up to 6x in 0.2x increments by using the zoom control to raise or lower the magnification value.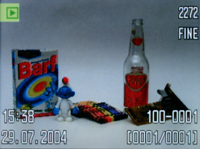 Image regular view |
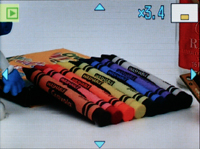 Image magnified 3.4x |
The main benefit of QV mode is that pressing the menu button or half-pressing the shutter button will return the camera to record mode. In playback mode, there are quite a few additional options available through the menu:
| Playback Menu 1 | |
| Delete | This frame, All frames, Marked frames |
| Format | Enter |
| Lock | This frame, All frames, Marked frames, Unlock all |
| Edit movie (Z2) | Enter |
| Copy | This frame, Marked frames |
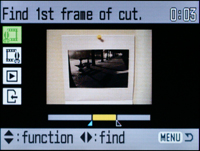
Z2 Edit movie screen
Like many digicams, the Z2 and Z3 offer the option to "lock" specific frames to prevent accidental deletion. The "Edit movie" function is a great idea, although it is only available on the Z2. It switches over to a basic editing screen where you can specify a section of a video to delete. When you have specified the first and last frames of the cut, you can preview the edit and save it as a new file on the flash card. The copy function allows you to copy single files or marked files to another flash card.
Below is the second set of menu options:
| Playback Menu 2 | |
| Slideshow | Enter |
| Playback | All frames, Marked frames |
| Duration | 1-60 sec. |
| Repeat | Yes, No |
These settings pertain to the slideshow feature. The "Playback" menu option allows you to indicate if you want all the frames displayed in the slideshow or just specific ones. For the duration that each frame is displayed, you can specify a time from 1 - 60 seconds. There is also an option to loop the slideshow after all the images have been shown. The third set of options is outlined below:
| Playback Menu 3 | |
| DPOF | This frame, All frames, Marked frames, Cancel all |
| Date print | On, Off |
| Index print | Yes, No |
| E-mail copy | This frame, Marked frames |
| Image size (Z2) | 640x480, 160x120 |
The DPOF (Digital Print Order Format) option allows you to select which images you wish to print on a DPOF-compatible printer. If the "Date print" option is enabled, the date will be printed on each picture. The index print option specifies whether or not you want an index to be printed with your pictures. The image size setting is only available on the Z2 and it specifies the resolution to use when resizing pictures selected with the "E-mail copy" function. The Z3 sets e-mail images automatically to 640x480. In playback mode, you can also view images on a TV by using the supplied A/V cable. NTSC or PAL is selectable in the main "Setup" menu.
Originally published at https://www.anandtech.com/show/1462 (Wayback Machine).