
BitFenix Ronin Case Review
- Posted in
- Cases/Cooling/PSUs
- bitfenix
- ATX
Assembling the BitFenix Ronin
There are a few reasons to go with larger cases if you're assembling a full ATX system: a larger ATX case will typically offer support for larger fan sizes (which can move more air at lower fan speeds and thus run at lower noise levels), and it's liable to be less cramped when you're working on it. That's not to say the BitFenix Ronin is particularly cramped, but it's definitely a change when you consider the last case I assembled was the NZXT Phantom 530.


Installing the motherboard could've been a little more convenient; there's no alignment stud like Corsair typically includes, and only two standoffs come preinstalled in the tray. BitFenix at least includes a socket with a phillips head to make tightening the standoffs easier. I've taken to connecting SATA leads and case headers at this step as the dual GeForce GTX 580s hang over the SATA ports on our test board, and found that the routing holes in the motherboard tray are just a little on the small side.
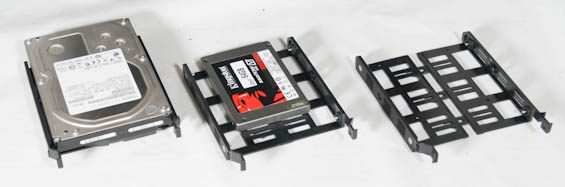
Where I think BitFenix made a really brilliant design choice is in the toolless drive trays. Typically there have been two ways to go about designing these: bendable plastic ones that snap around the 3.5" drive and don't feel secure but don't require tools, or firm steel ones (like the ones Fractal Design employs) that use screws but also feel secure as a result. Enter a third way: BitFenix's trays actually separate about a half inch, then close around the drive. These are really the best of both worlds; they feel secure while being toolless, and it's a very slick bit of engineering. You'll have to screw 2.5" drives into the trays still, but 3.5" drives go in easy. Meanwhile, the toolless clamps on the 5.25" drive bays are the standard BitFenix ones and get the job done nicely.
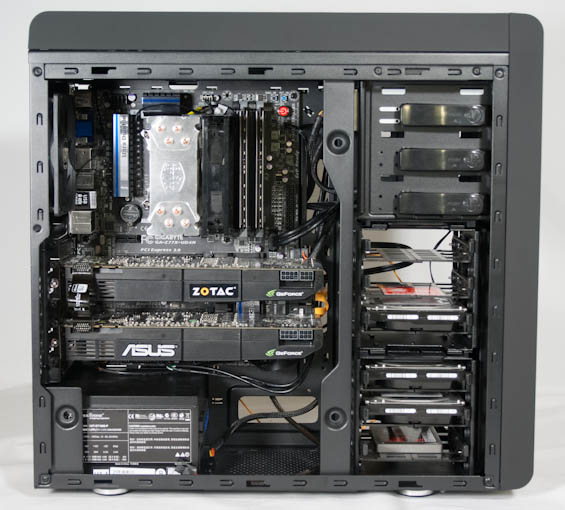
Lining up the power supply is easy enough, but if you're building a multi-GPU system the space for the cards is going to feel cramped. If I'd planned things a little more carefully I might have been able to do a better job of routing the power leads for the two 580s, but you can see in the photo above that we're really working with a fairly limited amount of space. If you put a high performance system in the Ronin, it's going to look and feel full.
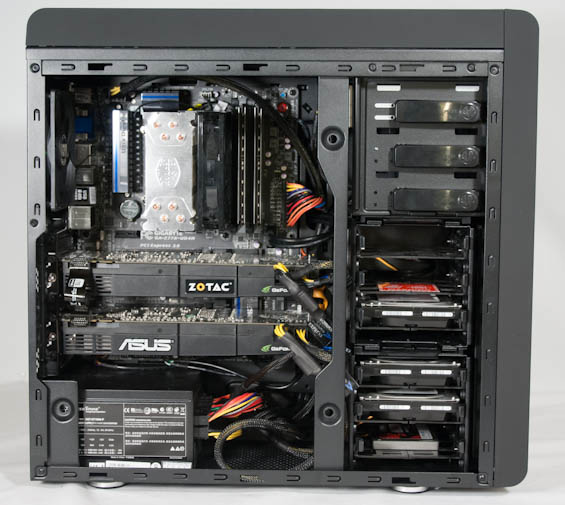
That problem gets compounded with cabling. There's a limited amount of space to route cables, and the hole for the AUX 12V line above the motherboard is just too small for the lead. Recognizing that I'm unusually daft when it comes to clean cabling jobs, it should nonetheless be evident that the reduced dimensions of the BitFenix Ronin will make it extremely difficult to do a clean build if you're installing a high performance system. Thankfully there's enough space behind the motherboard tray that getting the rear panel slotted back on wasn't too difficult, but I have to wonder if there wouldn't have been some way to make organizing cabling a bit easier.
Originally published at https://www.anandtech.com/show/7158/bitfenix-ronin-case-review (Wayback Machine).