
Intel Z87 Motherboard Review with Haswell: Gigabyte, MSI, ASRock and ASUS
Gigabyte Z87X-UD3H In The Box
Box contents can be a very important part of the package, especially in terms of additional cables, or perhaps USB 3.0 brackets. Most modern cases come with a USB 3.0 header, meaning motherboards with one header will most likely not get an additional bracket, but those with two headers could get one in the box. This of course adds cost to the product as a whole (such as WiFi/USB 3.0 5.25” boxes), so a manufacturer has to decide whether to include the $5-$10 worth of kit, or just bundle in $1 of bulk-purchase SATA cables in order to drive the motherboard to a lower price point. The motherboard is the key thing, right? Personally I have seen some outstanding bundles ($140 motherboard with that USB 3.0 bracket, or something as simple as plastic standoffs for overclockers), and some not so much.
The big competition from the UD3H on this front is the fact that in the last generation, the Z77X-UD5H was $180, and that was stripped in terms of box contents to meet an awesome price point.
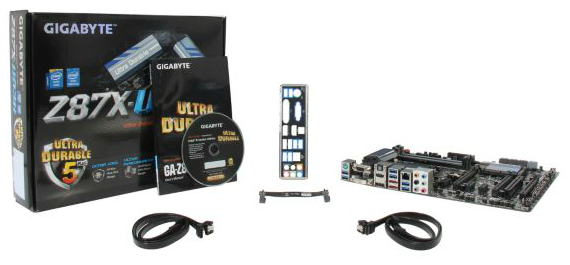
From the Z87X-UD3H, we get:
User Guide
Driver Disk
Rear IO Shield
Four SATA Cables
Flexi-SLI Bridge
Gigabyte Z87X-UD3H Overclocking
Experience with Gigabyte Z87X-UD3H
As my first overclocking experience on Haswell, I think it went rather well. I have heard some horror stories to do with Haswell (processors falling over at 4.2 GHz), but luckily enough the CPU I had is actually a bit of a corker.
In terms of the Gigabyte motherboard itself, the automatic options in the EasyTune software worked well, and those in the BIOS also worked, apart from the Extreme (4.7 GHz) setting. My only point of contention is that when a user applies any of these settings, it does not update the text values in the BIOS relating to the voltages or CPU speeds. Personally I like to see what the system is doing with an automatic setting, but on speaking to Gigabyte they prefer it the other way to allow users to adjust voltages by offset if needed on the automatic settings.
The settings I was able to figure out helped in deciding our manual overclocking procedure. This meant a starting point of 4.0 GHz (40x multiplier) and 1.000 volts, testing for stability and then either upping voltage when unstable or multiplier when stable. Alongside this we also adjusted the Integrated Voltage Regulator (FIVR) voltage input to 1.65 V and Load Line Calibration to High. With these in place, we hit 4.6 GHz stable at 1.250 V in the BIOS, and 4.7 GHz was just about stable at a rather high 1.425 volts.
Methodology:
Our standard overclocking methodology is as follows. We select the automatic overclock options and test for stability with PovRay and OCCT to simulate high-end workloads. These stability tests aim to catch any immediate causes for memory or CPU errors.
For manual overclocks, based on the information gathered from previous testing, starts off at a nominal voltage and CPU multiplier, and the multiplier is increased until the stability tests are failed. The CPU voltage is increased gradually until the stability tests are passed, and the process repeated until the motherboard reduces the multiplier automatically (due to safety protocol) or the CPU temperature reaches a stupidly high level (100ºC+). Our test bed is not in a case, which should push overclocks higher with fresher (cooler) air.
Automatic Overclock:
For automatic overclock options, we can either decide whether to apply options in the OS via the EasyTune software or through the BIOS:
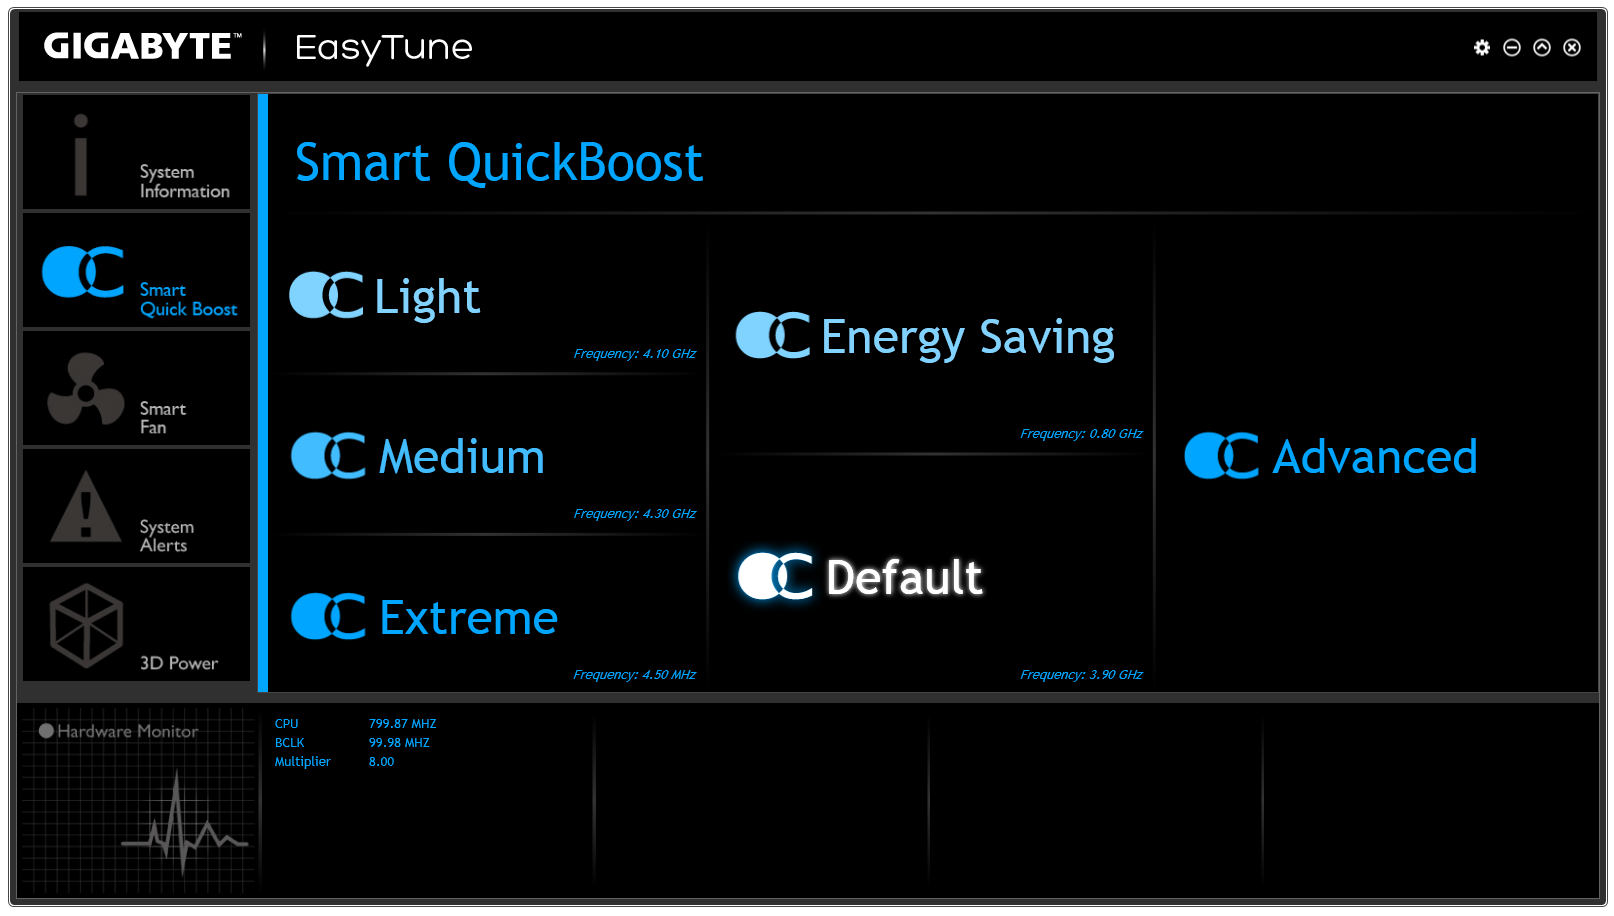
Starting with the OS, we tested EasyTune Light, Medium and Extreme:
- Light: Sets 41x100, 1.150 V CPU and 1.770 volts VRIN. Gives 1.087 volts at load, a PovRay score of 1677.97 and passes OCCT with 66C max temperature. Also sets memory to XMP minus one strap.
- Medium: Sets 43x100, 1.287 V CPU and 1.692 volts VRIN. Gives 1.280 volts at load, a PovRay score of 1739.42, and passes OCCT with 83C max temperature. Also sets memory to XMP minus one strap.
- Extreme: Sets 45x100, 1.287 V CPU and 1.692 volts VRIN. Gives 1.284 volts at load, a PovRay score of 1824.35, and passes OCCT with 79C max temperature. Also sets memory to XMP minus one strap.
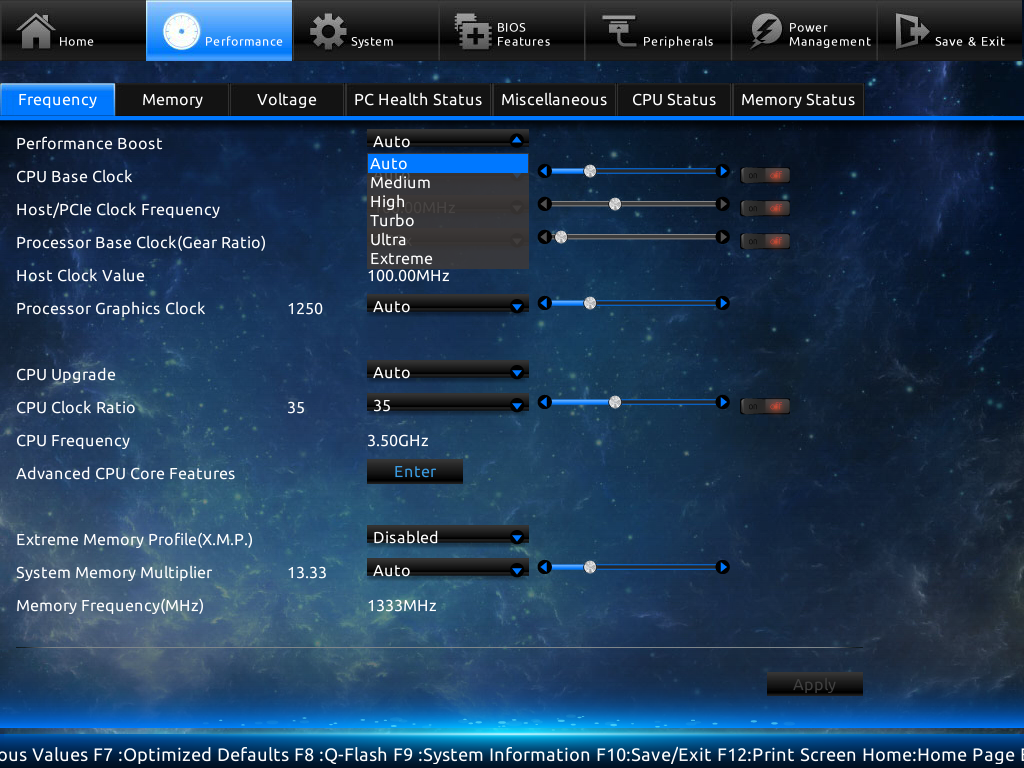
Through the BIOS, we tested Performance Boost levels from Medium to Extreme:
- Medium: 43x100, 1.752 volts VRIN. Gives 1.285 volts at load, PovRay of 1757.37 and OCCT passed at 82C.
- High: 44x100, 1.704 volts VRIN. Gives 1.280 volts at load, PovRay of 1785.38 and OCCT passed at 85C. Sets DRAM to 1600 10-11-11.
- Turbo: 45x100, 1.692 volts VRIN. Gives 1.284 volts at load, PovRay of 1839.53 and OCCT passed at 87C. Sets DRAM to 1866 10-13-13.
- Ultra: 46x100, 1.692 volts VRIN. Gives 1.284 volts at load, PovRay of 1857.82 and OCCT passed at 88C. Sets DRAM to 1866 10-13-13.
- Extreme: 47x100, 1.680 volts VRIN. Gives 1.344 volts at load, PovRay of 1898.45 but a BSOD with OCCT. Sets DRAM to 2133 10-14-14.
Manual Overclock:
With the information from the automatic overclock, we achieved the following manual overclock results:

Originally published at https://www.anandtech.com/show/6989/intel-z87-motherboard-review-with-haswell-gigabyte-msi-asrock-and-asus-at-200 (Wayback Machine).