
Cooler Master's Storm Enforcer: The Not-So-Quiet Storm
Assembling the Cooler Master Storm Enforcer
Actually putting together the Cooler Master Storm Enforcer was nearly as painless as the BitFenix Shinobi was, a welcome change of pace before I get into the more complex enthusiast-class Thermaltake Level 10 GT and SilverStone Raven RV-03 next month. Cooler Master includes a multilingual instruction manual and a host of adaptors, screws, and zip-ties, but most of the assembly was fairly self-explanatory.


The Enforcer includes just two motherboard standoffs installed by default and I'd honestly have liked to see all of the standoffs for ATX installed from the get-go, but it's a minor nuisance and Cooler Master includes a handy phillips-to-socket adaptor for screwing in the standoffs. Our testbed has been in and out of so many cases now that getting it and the I/O shield installed snugly was a breeze. Connecting front panel headers was likewise simple. A refreshing change of pace from the BitFenix Shinobi and NZXT H2, the headers are brightly color-coded. Unfortunately Cooler Master doesn't include an adaptor for turning the USB 3.0 motherboard header cable into a pass-through, so that cable wound up getting hidden behind the motherboard tray while the USB 3.0 ports sit lifelessly at the top of the chassis. There's also a separate PC speaker included that's not built into the case.
Removing the 2.5" drive cage was easy enough, but installing the SSD was slightly comical. The screws included for mounting the SSD are just a little bit fat, and though it did mount fine there was some...manipulation involved. A couple of screws may or may not have been launched off of the table. Still, you can install the drive with the connectors facing a convenient opening in the tray, and even when I went to route cables it was still fairly easy to connect the SSD.
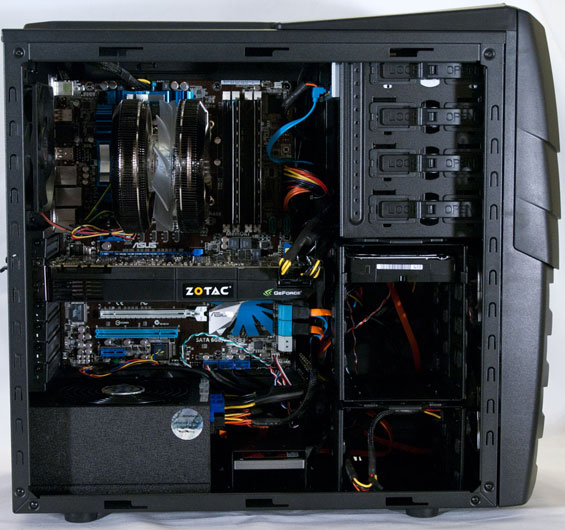
Installing the optical drive and hard drive were an absolute breeze. The rails for the HDD snapped into place, then the drive slid and locked into the cage, and everything was golden. The shields for the 5.25" external bays are also extremely easy to remove: slip your hand into the drive cage and pinch the sides of the shield, and it'll pop right out. From there, move the switch on the bay to "open", slide the drive in, line up the mounting holes, and switch it back to "lock." So simple. Clearance for installing our GeForce GTX 580 was actually perfectly fine, too, but you can remove the middle 3.5" drive cage if you need to install a monster like a Radeon HD 6990.
Where things did get a little bit slippery was with the power supply. Due to the position of the 2.5" drive cage combined with where the modular connectors are on our testbed power supply, the PSU had to actually be installed inverted, with the intake fan facing up inside the case. The back of the Enforcer supports installing power supplies in this orientation, but it's not ideal. Routing the power cables was easy enough, though, and the routing hole and extra clearance at the top of the case for the AUX 12V cable was a godsend.
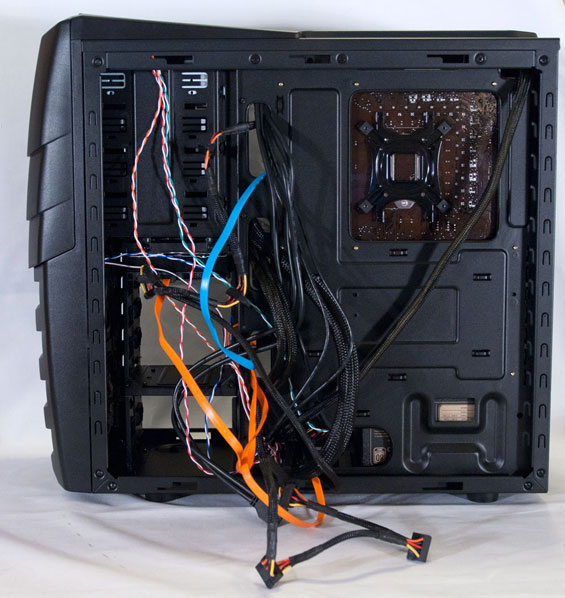
Unfortunately, getting the side panels back on was another matter entirely. There's space behind the motherboard tray for routing cables, but if a molex or SATA power connector can't fit back there it's not enough. The BitFenix Shinobi had stellar clearance and some of In-Win's cases are just as generous, but the Enforcer required me to move the excess SATA power cables into one of the bottom drive bays before I could force the back panel on.
Originally published at https://www.anandtech.com/show/4466/cooler-masters-storm-enforcer-the-notsoquiet-storm (Wayback Machine).