
A Trio of Thermaltake Towers
- Posted in
- Cases/Cooling/PSUs
Thermaltake Eureka - Installation
We'll wrap up our look at the Eureka by stepping through some of the installation steps of our standard ATX test bed. First up was putting the power supply into place, which is easy thanks to the ample space above it. Next we mounted the motherboard to the removable tray, which had all the appropriate standoff positions clearly labeled just like all Thermaltake cases we've looked at lately.
As noted earlier, slipping the tray into place was easy as well. There were really no cable problems to speak of - there is plenty of room for even the most complicated server builds, and the very standard layout only amplifies this point.
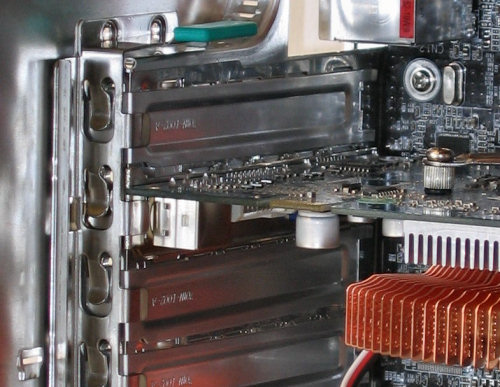
A close-up of the expansion card clip shows how it supports the weight of our 6600GT video card. To undo the strip one has to lift on the green plastic tab at the top.
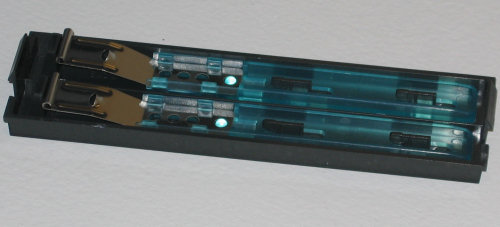
In another effort to simplify things the Eureka keeps the 5.25" rails behind each drive bay cover.
Once our install was completed we noticed how much the honeycomb grill acts like a standard case window, letting users see the contents of their computer - especially if there are extra lights inside. With this much venting on the side though, we worried that the case might not adequately cool the hard drives.
Many cases are designed to create a "wind tunnel" effect from the front of the case to the rear fans; all of the venting can negate that type of air flow, so the end result is almost like removing the side panels altogether. That may or may not cool effectively, but before temperature testing let's look at the third case in the comparison.
We'll wrap up our look at the Eureka by stepping through some of the installation steps of our standard ATX test bed. First up was putting the power supply into place, which is easy thanks to the ample space above it. Next we mounted the motherboard to the removable tray, which had all the appropriate standoff positions clearly labeled just like all Thermaltake cases we've looked at lately.
 |
| Click to enlarge |
As noted earlier, slipping the tray into place was easy as well. There were really no cable problems to speak of - there is plenty of room for even the most complicated server builds, and the very standard layout only amplifies this point.
 |
| Click to enlarge |
A close-up of the expansion card clip shows how it supports the weight of our 6600GT video card. To undo the strip one has to lift on the green plastic tab at the top.
In another effort to simplify things the Eureka keeps the 5.25" rails behind each drive bay cover.
Once our install was completed we noticed how much the honeycomb grill acts like a standard case window, letting users see the contents of their computer - especially if there are extra lights inside. With this much venting on the side though, we worried that the case might not adequately cool the hard drives.
 |
| Click to enlarge |
Many cases are designed to create a "wind tunnel" effect from the front of the case to the rear fans; all of the venting can negate that type of air flow, so the end result is almost like removing the side panels altogether. That may or may not cool effectively, but before temperature testing let's look at the third case in the comparison.
Originally published at https://www.anandtech.com/show/2063 (Wayback Machine).