Internal Design
The case that Ahanix sent us already had an entire system installed, so for the purposes of this review, we only removed the parts necessary for the review. Already mentioned was the fact that the power supply included with this case is of a non-standard size, so if one already had a nice power supply that they were planning on using inside a new HTPC case, this would not be the case of choice.
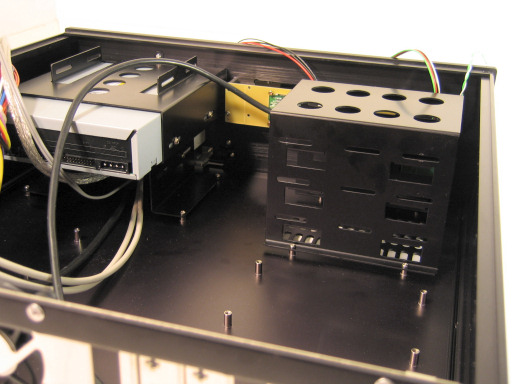
Looking towards the front of the case from above, we can see a relatively simple layout that has been improved in several ways from the D-Vine5.
Click to enlarge.
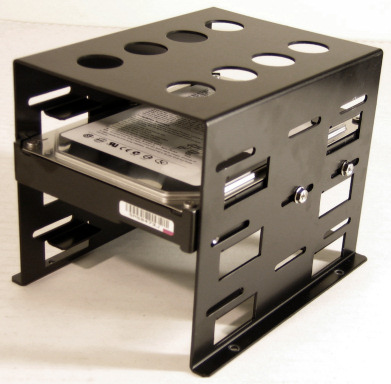
The first and quite possibly most important improvement is the inclusion of a cage for holding three standard 3-1/2” internal hard drives. With not only the D-Vine5, but also many other HTPC cases, the ability to hold several hard drives is often overlooked, and with one of the primary uses of a system like these being digital video recording, we definitely consider the absence of this support crippling – especially as high definition content begins to gain more momentum and the disk space required to record even one normal-length movie could be as high as 20 gigabytes. Here is a close-up of the included HDD cage with a disk drive installed.
Click to enlarge.
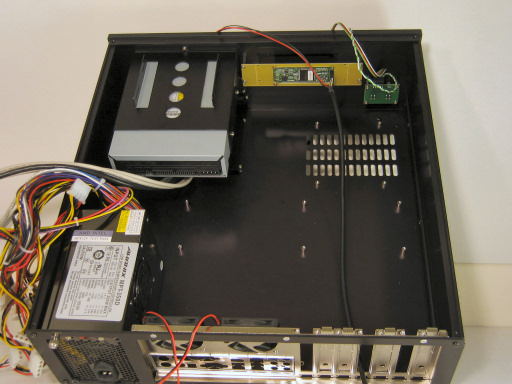
Without the HDD cage in place, we noticed the placement of extra ventilation holes in the bottom of the case to help passively cool the hard drives.
Click to enlarge.
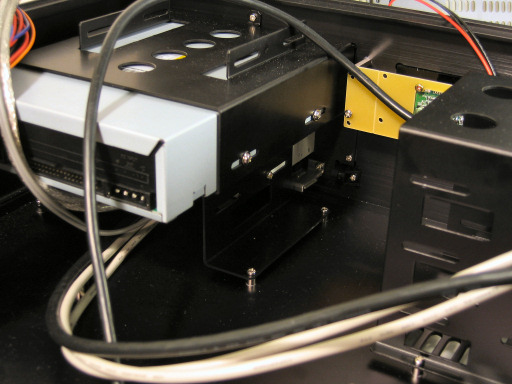
The optical drive assembly is designed to hold one 5-1/4” drive and one 3-1/2” drive, both external. Again, our review sample came with a DVD drive in the 5-1/4” bay and a flash media card reader drive in the 3-1/2” bay, for which you can see several of the mounting screws in the following image.
Click to enlarge.
One could always choose simply to install a drive from only the side, but the chance of resulting vibration noise is most certainly not worth it in an application like this. In order to install a drive fully in the MCE601, one has to remove the entire cage assembly, which is not exactly an easy task. A design that would have made the procedure for removing and installing the entire cage unit tool-less would definitely have made this chassis more appealing.
The front panel electronics are also exposed in this shot as are the various cables coming from the front bezel for connection to the motherboard. Cable clutter could become a problem with this many connections, so if tidiness is important to you, be sure to have several zip-ties on hand when installing a system into this case.
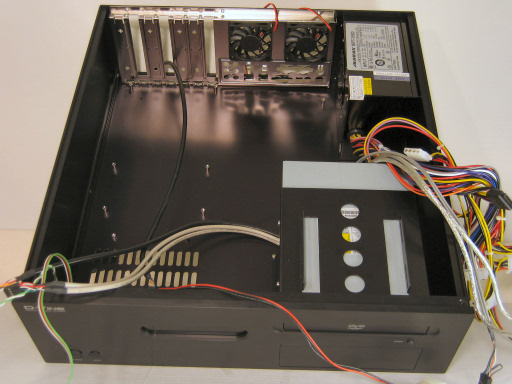
Click to enlarge.
Looking at the back of the case, we again see the twin 60mm fans situated directly behind the CPU area as well as the six included motherboard standoffs. We will cover those in a bit more detail in the motherboard section of the review. For now, let’s take a closer look at the included cooling hardware.



