
Olympus Stylus Verve: Fashion vs Performance
- Posted in
- Digital Camera
Playback Features
Playback mode can be entered by either pressing the Quick View button or by rotating the Mode Dial to Play. The Left/Right arrow buttons are used to skip back/forward to different images. The up arrow button skips back 9 images while the down arrow skips forward 9 images.  Image regular view |
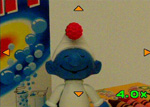 Image magnified 4x |
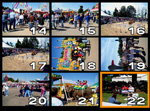 9-image thumbnail |
An image can be magnified up to 4x in 0.5x increments by using the zoom controller. Additionally, a 4-, 9-, or 16-image thumbnail display can be reached by pressing the left side of the zoom controller. The number of images to show in thumbnail mode can be specified through the Setup tab.
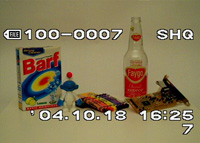 Standard info. |
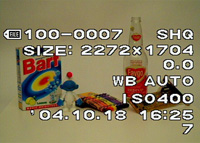 Detailed info. |
The standard playback information includes the file number, recording quality, date, time, and the number of the image. After initially viewing an image, this information is displayed for about 3 seconds before disappearing. The detailed playback information includes the following additional items: resolution, exposure compensation, white balance, and ISO.
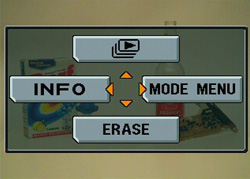
Play menu
The major playback operations can be reached via the OK/Menu button. After pressing it, four main options are displayed: Slideshow, Info, Erase, and Mode Menu. To delete an image, just press the down arrow button to select "Erase". The camera then displays a confirmation dialog to prevent accidental deletion. The "Info" option toggles the shooting information from standard to detailed. The "Slideshow" option advances the images/videos automatically. The duration for each image is approximately three seconds.
The final option is "Mode Menu", which is split into the following 4 tabs: Play, Edit, Card, and Setup. Below are the options under the Play tab:
| Play | |
| Protect | Off, On |
| Rotate | 0°, -90°, +90° |
| Print Order | Select, All |
| Audio Commentary | Start |
The Protect option allows you to mark an image as "protected". This helps to prevent accidental deletion/modification of an image. The Rotate feature can rotate images 90° clockwise or counterclockwise. With the Print Order option, you can specify images for printing as well as the number of copies desired. You can also specify whether or not to stamp the time or date on the printed images. The Audio Commentary option allows you to record a short audio clip. The clips are saved as WAV files with the same file number as the image.
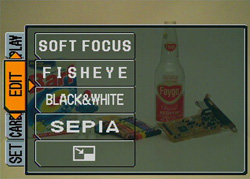
The "Edit" tab offers some options for manipulating images in-camera. A Soft Focus or Fisheye effect can be applied to any image. Additionally, an image can be converted to black and white, or sepia. The final option in the Edit menu is Resize. An image can be resized to either 640x480 or 320x240. When any of these options are applied, the camera saves the manipulated image as a new file. Another interesting option is called "Index". It only appears as an option when a video clip is selected. When Index is selected, the camera will create a JPEG file containing 9 thumbnails from the video clip. This allows you to see an overview of the video clip.
The Card tab only has two options: All Erase and Format. The All Erase option will delete everything on the flash card that is not protected. Format will erase everything on the flash card - even protected files. The Setup tab is almost exactly the same as it is in Record mode. The only difference is the addition of two more options: Screen Setup and an option to change the thumbnail display. With Screen Setup, you can select a previously taken image to be used as the startup screen. The thumbnail option offers 3 more options for the number of images to display in thumbnail mode; these are 4, 9, and 16 images.
Originally published at https://www.anandtech.com/show/1531 (Wayback Machine).