
5 Megapixels for < $300: Kodak DX4530, Olympus C-50 Zoom, Casio QV-R51
- Posted in
- Digital Camera
The Design: Kodak DX4530
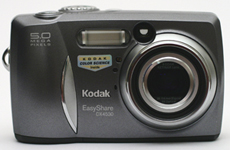
110.5 x 66 x 39mm
The first thing to notice about the Kodak DX4530 is that it is quite a bit bulkier than the other two other cameras in this roundup, and it has a rounded plastic body. The front of the camera houses the lens, built-in flash, viewfinder window, self-timer light, light sensor, and microphone. The lens is capable of an optical zoom of 3x (38 - 114mm equivalent on a 35mm camera) and a digital zoom of 3.3x. The aperture range is f2.8 - 4.8 and the shutter speed range is 1/1700th - 4 seconds. The built-in flash has a range of 2-11 ft in wide angle mode and 2-6.6 ft in telephoto mode.
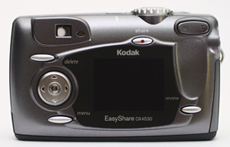
You would think that with a larger size body, this camera would have a larger screen to fit, but such is not the case here. The monitor is a pretty standard-sized 1.8" indoor/outdoor display with 72,000 pixels. That being said, Kodak did use the space to make the camera more comfortable to hold. It has a depression for our thumb on the back and a decent front grip for our other fingers. The camera's directional controls are on the left side of the LCD monitor between the delete and menu buttons. Kodak decided not to make the OK button independent from the arrow pad. Instead, the OK button is activated by pressing in the middle of the arrow pad. Although this can sometimes create a problem on some cameras, we found this button to be easy enough to press without triggering one of the arrows accidentally. On the top left are the optical viewfinder and the Ready light. Just above the LCD monitor is the share button, which is used for tagging your favorite pictures that you would like to email or print later. On the right side of the LCD monitor are the review button and the zoom controls. It should be noted that the optical zoom on this camera only has 7 positions and they are predefined. This means that by tapping the Telephoto side of the zoom control, the camera will zoom a certain amount automatically, no matter how fast you press it.
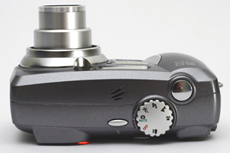
On the top of the camera, you will find the shutter button on the right. Just to the left is the mode dial, which is used to switch the camera from the Off position to one of the following modes: Auto, Sport, Night, Landscape, Close-up, and Video. To the left of this dial is the camera's speaker and flash button. When the camera is on, pushing the flash button will cycle through the different available flash modes: Auto, Off, Fill, and Red-eye.
 |
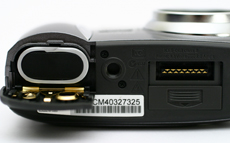 |
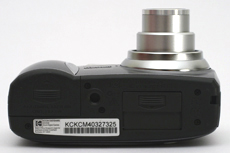
On the bottom of the camera, there is a hinged door that swings open to reveal the battery compartment, which will accept any of the following battery types: CRV3 lithium, 2-AA lithium, Ni-MH rechargeable battery pack, or 2-AA Ni-MH rechargeable. Just to the right of the battery compartment is a plastic tripod mount. Finally, just below the lens is the connection to the optional EasyShare dock. The connection has a sliding door to protect it from dust and particles. We found this door to be a little too easy to slide back and forth. On several circumstances, we found that the door had opened itself during regular use of the camera. Kodak must not have been too worried about foreign matter getting into the connections.
 |
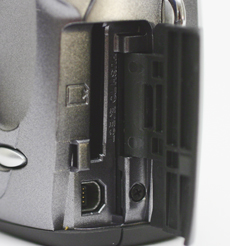 |
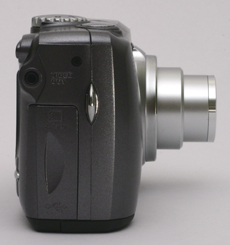
The right side of the camera has an audio/video-out port. Video output can either be NTSC or PAL (selectable as a menu option). There is a sliding hinged door that covers the USB port and the SD/MMC slot. Also on the right side is the wrist strap post.
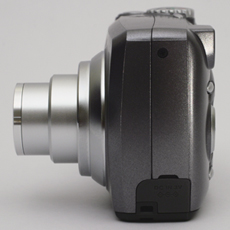
The only thing on the left side of the camera is the port for the optional 3V AC adapter and the lens cap strap post (used to secure the enclosed lens cap).
This camera offers 4 image size settings: Best ***, Best (3:2) ***, Better **, or Good *. While these options seem a little abstract, we've outlined the details in the table below.
| Setting | Compression | Resolution (pixels) |
| Best *** | JPG | 2580x1932 |
| Best (3:2) *** | JPG | 2580x1720 |
| Better ** | JPG | 2032x1524 |
| Good * | JPG | 1288x966 |
All 4 of the quality settings are JPEG and there is no option to shoot in an uncompressed mode. This camera shoots with an aspect ratio of 4:3 on all settings except the one specified above. The DX4530 comes with 32MB of internal memory. This is a feature that is being seen more in newer digital cameras. It is a great feature to have if you are out shooting and you run out room on your memory card; at least you know that you can fit a few more shots on the internal memory. As nice as it is, you are going to need a memory card sooner or later because Kodak allows for 21 pictures to be taken on the internal memory at the highest quality setting. The DX4530 supports SD/MMC memory cards. These smaller card types are becoming increasingly popular because of their compact size and, more recently, due to their speed potential. Recently, Pretec announced their new 2GB MMC card that offers 18MB/sec write speed and 22.5MB/sec read speed. With advances like these, I think that we will be seeing more companies moving away from the larger format cards like Compact flash.
This camera does not offer manual focus. The DX4530 uses an auto focus system that marks off the focal point with a pair of brackets. However, the user does not have total control over the focal point as shown through the camera. In the user's guide, there is only one page dedicated to the auto focus system. It states that you should press the shutter button half-way to set the focus (the camera will focus on subjects in the foreground by default). The camera will then show you on the monitor what it has chosen as its focal point. The manual says to repeat the process until the camera focuses on your desired subject.
In addition to the limited focus options, the only option that Kodak gives for exposure control is through the exposure compensation setting. This feature gives the user the ability to change the exposure by +/- 2 stops in 1/2 step increments. Unfortunately, getting to this option through the menu isn't very convenient. You must press the Menu button, use the arrow keys to scroll down to Exposure Compensation, press OK, use the arrow keys to select the amount of compensation, then press OK again. Kodak could have made this feature easier to access by simply assigning compensation to the left and right arrow keys, especially since these keys currently serve no other function.
Because this camera is aimed at point-and-shoot users, there are no options for adjusting white balance. In addition, there are no options for metering. Instead, white balance is always automatic and the camera's multi-pattern metering mode is used. There are no manual settings on the DX4530 where you can adjust aperture and shutter speed. The user is confined to Auto, Sport, Night, Landscape, and Macro modes. In macro mode, you can focus from 2.8 - 28 inches in wide angle and 11 - 28 inches in telephoto. With no manual control available, it should come as no surprise that the DX4530 offers no way to adjust the ISO setting on the camera. It is automatically chosen and will fall between ISO 130-200.
Like many consumer digicams, this camera offers a video mode, which records in QuickTime (MOV) format with a resolution of 320x240 at 15 fps. We should point out that this camera is capable of recording audio with the video clip (something that is not yet standard with movie-capable cameras). You can either record a video clip by holding down the shutter button for the length of time that you wish to record or you can press the shutter button once to begin recording and again to stop. If you turn on the self-timer function, you can set the record time to unlimited, 5, 15, or 30 seconds. With the self-timer, there will be a 10-second delay before the camera starts recording.
The DX4530 has a menu option called "Long Time Exposure", which gives the user the option to do a long exposure. The options are preset at: 0.7", 1", 1.5", 2", 3", and 4". This option to do a long exposure is one of the few "creative" options that Kodak offers on this camera. Another feature that is worth mentioning is the Orientation Sensor. In the menu, you can turn on this sensor, which will automatically rotate your pictures for you if you had the camera tilted upright (for a portrait shot, for example). This feature can save you time later when editing the pictures on your computer.
Playback
In playback mode, you have the option to magnify an image (with 2x and 4x as options). This feature can be used to check the focus of a picture to ensure that it is sharp enough. It is also worth noting that moving to different areas of a magnified photo is fast and smooth with the use of the directional arrow pad. You can hold one of the arrow keys and immediately move across the entire picture without having to press the arrow key repeatedly.Also during playback, you have the option to press the Share button in order to mark a picture or video clip for future identification. This makes remembering your favorites easier when you transfer everything to your computer or print from a Kodak printer. Two other playback options that are convenient are the ability to protect and copy pictures. When you mark a picture as "protected", you cannot delete it until protection is removed. However, formatting the card will erase all pictures and videos, whether or not they are protected. The ability to copy either from a flash card to the internal memory or vice versa is a nice feature to have, as it allows you to transfer pictures from friends' memory cards without the use of a computer.
Originally published at https://www.anandtech.com/show/1391 (Wayback Machine).