
Digital Camera Review Guide
- Posted in
- Digital Camera
Testing Procedures
The Battery Test
Our battery test is designed to report an ideal number of shots that a battery cycle will allow. The method is as follows:- Fully drain the camera's batteries (by shooting until dead)
- Recharge the battery to full capacity
- Reset the camera to factory default settings
- Set the camera to largest recording mode available (RAW if possible)
- Load the camera with a memory card
- Turn on LCD preview monitor (if available)
- Take 5 pictures without the flash
- Take 2 pictures with the flash
- Repeat process until memory card is full
- Turn off camera
- Turn on camera
- Delete all pictures with in-camera function (use in-camera format option every other time if available)
- Begin taking pictures where we left off until we can't take any more (i.e.we continue to take pictures without the flash, if the camera allows us, until the battery is fully dead)
Timing Tests
Our timing tests help to see how a camera performs from a technical standpoint. It is one of the ways that we are able to compare the performance of cameras in a strictly technical manner. We have three tests that we run on every camera: shutter lag, startup time, and disk write time. For all of our timing tests, we reset the camera to its default settings.Shutter Lag: UPDATE (7/22/04): We have updated our shutter lag test method to a more accurate one. For our new test, we start a stopwatch and perform 2 separate tests. For the first test, we pre-focus the camera on the stopwatch display and press the shutter button as soon as the stopwatch displays a new second. This first test will give us the time it takes the camera to actually take a picture after the shutter button is pressed. For the second test, we do not pre-focus the camera. Instead, we fully press the shutter button as soon as the stopwatch displays a new second. This records the time it takes the camera to focus and take a picture. We perform both of these tests 3 times and review the pictures. The 3 times for each test are averaged.
Our previous shutter lag test included the use of Ed Schwartz's Shutter Release Test.
Startup Time: In order to test a camera's startup time, we measure the amount of time it takes from the moment we turn on the power to the moment the camera is able to take a picture. We first disable the flash and auto-focus. We then turn the camera off and wait two seconds. We start a timer and turn on the camera at the same time. For some cameras, if you hold down the shutter release button, it will take a picture as soon as it can. For cameras like this, we simply hold down the trigger button and stop the timer as soon as the camera begins to take a picture. For other cameras, we press the shutter release button repeatedly as fast as we can until it takes a picture. We perform this test three times and calculate the average.
Disk Write Times: First, we set the camera to the highest quality setting (compressed). We take a picture and start the timer as soon as the "busy" light comes on, indicating disk activity. We stop the timer as soon as the light goes out. Again, we perform this test three times and record the average.
Image Quality Tests
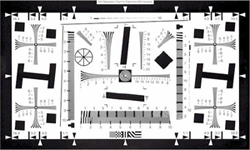
In order to test image quality, we have devised three tests that will each focus on different points of quality. For all of our studio shots, we reset the camera to its default settings and turn off the flash.ISO 12233 IEEE Approved Resolution Chart: We use this chart to test the camera's ability to resolve fine lines.
|
For this test, we use the camera's manual WB (white balance) if available. The camera is set to record at the highest quality setting. We use our default lighting setup (3-500 watt tungsten studio lights reflected off a white ceiling for even lighting). Then we take a look at the image and analyze the results. |
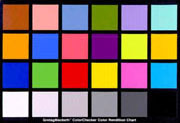
GretagMacBeth ColorChecker: This chart is used to test the camera's ability to represent realistic colors.
| For this test, we the use camera's highest quality setting (compressed). If the camera offers a manual white balance option, we take two pictures: one with Auto WB and one with manual WB. If the camera doesn't have an option for manual WB, we will use the Auto setting. Then we compare the results to the exact RGB color values to see how well the camera performs in comparison to the true colors. We use the same default lighting setup for the color test. |
|
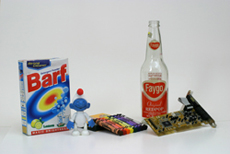
Noise: For our noise test, we shoot a more practical scene that we have created in the studio. It is an image that we can recreate with all of our cameras as a means of comparison.
| For the noise test, we set the camera to the highest quality recording setting (compressed) and Manual WB (if available). We then take pictures using a range of different ISO settings to compare noise levels. In designing this scenario, we picked objects that we thought would test the camera's overall ability to represent detail, tonal range, and general image quality. Again, we use our default lighting setup for the studio shot. |
|
Built-in Flash
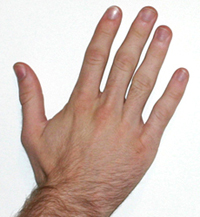
Our flash test is simply a picture of our hand to analyze the camera's tonal accuracy when using a flash.
|
We set the camera to a fully automatic mode and use the highest quality setting (compressed). The camera is positioned five feet from our hand. For this test, we use low ambient tungsten house lighting and the camera's built-in flash. The purpose of this test is to give an example of the camera's ability to replicate skin tones accurately with the flash. |
Originally published at https://www.anandtech.com/show/1375 (Wayback Machine).