
The ASRock Z370 Gaming-ITX/ac Motherboard Review: Mini-ITX with Thunderbolt 3
Overclocking
Experience with the ASRock Z370 Gaming ITX/ac
Overclocking with the ASRock Z370 Gaming ITX/ac was a pretty straightforward experience. While the board does not have all of the fancy overclocking features the Apex or other larger boards can have, it was able to push our CPU to its limit using the Corsair H115i cooler. The board's heatsinks handled the overclocked load without issue ending up warm to the touch after our 30-minute OCCT session (no sensor for this to share exact temperatures).
For the auto overclocking, we used the BIOS option in the EZ Mode which is a simple enable/disable functionality. In this case, the auto overclock yielded a result of all cores at 4.5 GHz with a -2 AVX offset. Surprisingly, the voltage was set to the CPUs VID (~1.12V) instead of pouring on voltage as we have seen in the past from other boards. In the end, non-AVX instructions sets will run at 4.5 GHz while AVX loads will run at the stock 4.3 GHz due to the added offset.
Manual overclocking was as easy as Intel unlocked processor overclocking can get. Up to 5 GHz, it was set the multiplier and voltage, then go! The Z370 Gaming-ITX/ac was the first board which showed a notable amount of vdroop when testing. Our manual setting was 1.20V in the BIOS with LLC set to Auto (Level 5) which caused load voltage to drop to 1.12V, a difference of 0.08V. I chose to run like this until 5 GHz as my starting voltage was up at 1.35V to yield 1.248V on load (a large 0.11V difference). It was at this point I raised the LLC to Level 1 manually which resulted in much less difference between idle and load voltage. It was also at 5 GHz where I ran into power limit throttling. Once I raised that value, the board pushed forward without issue.
The BIOS contained everything needed for overclocking at ambient temperatures and handled it without significant issues. Just be aware of the vdroop and when really pushing things, the power limits and all should be well. The F-Stream software proved functional for my uses raising core voltage and changing multipliers. In situations like these testing overclocks, raising the voltage in Windows can be a real time saver versus booting back to the BIOS making changes and coming back to Windows to test.
Overclocking Methodology
Our standard overclocking methodology is as follows. We select the automatic overclock options and test for stability with POV-Ray and OCCT to simulate high-end workloads. These stability tests aim to catch any immediate causes for memory or CPU errors.
For manual overclocks, based on the information gathered from the previous testing, starts off at a nominal voltage and CPU multiplier, and the multiplier is increased until the stability tests are failed. The CPU voltage is increased gradually until the stability tests are passed, and the process repeated until the motherboard reduces the multiplier automatically (due to safety protocol) or the CPU temperature reaches a stupidly high level (90ºC+). Our test bed is not in a case, which should push overclocks higher with fresher (cooler) air.
Overclocking Results
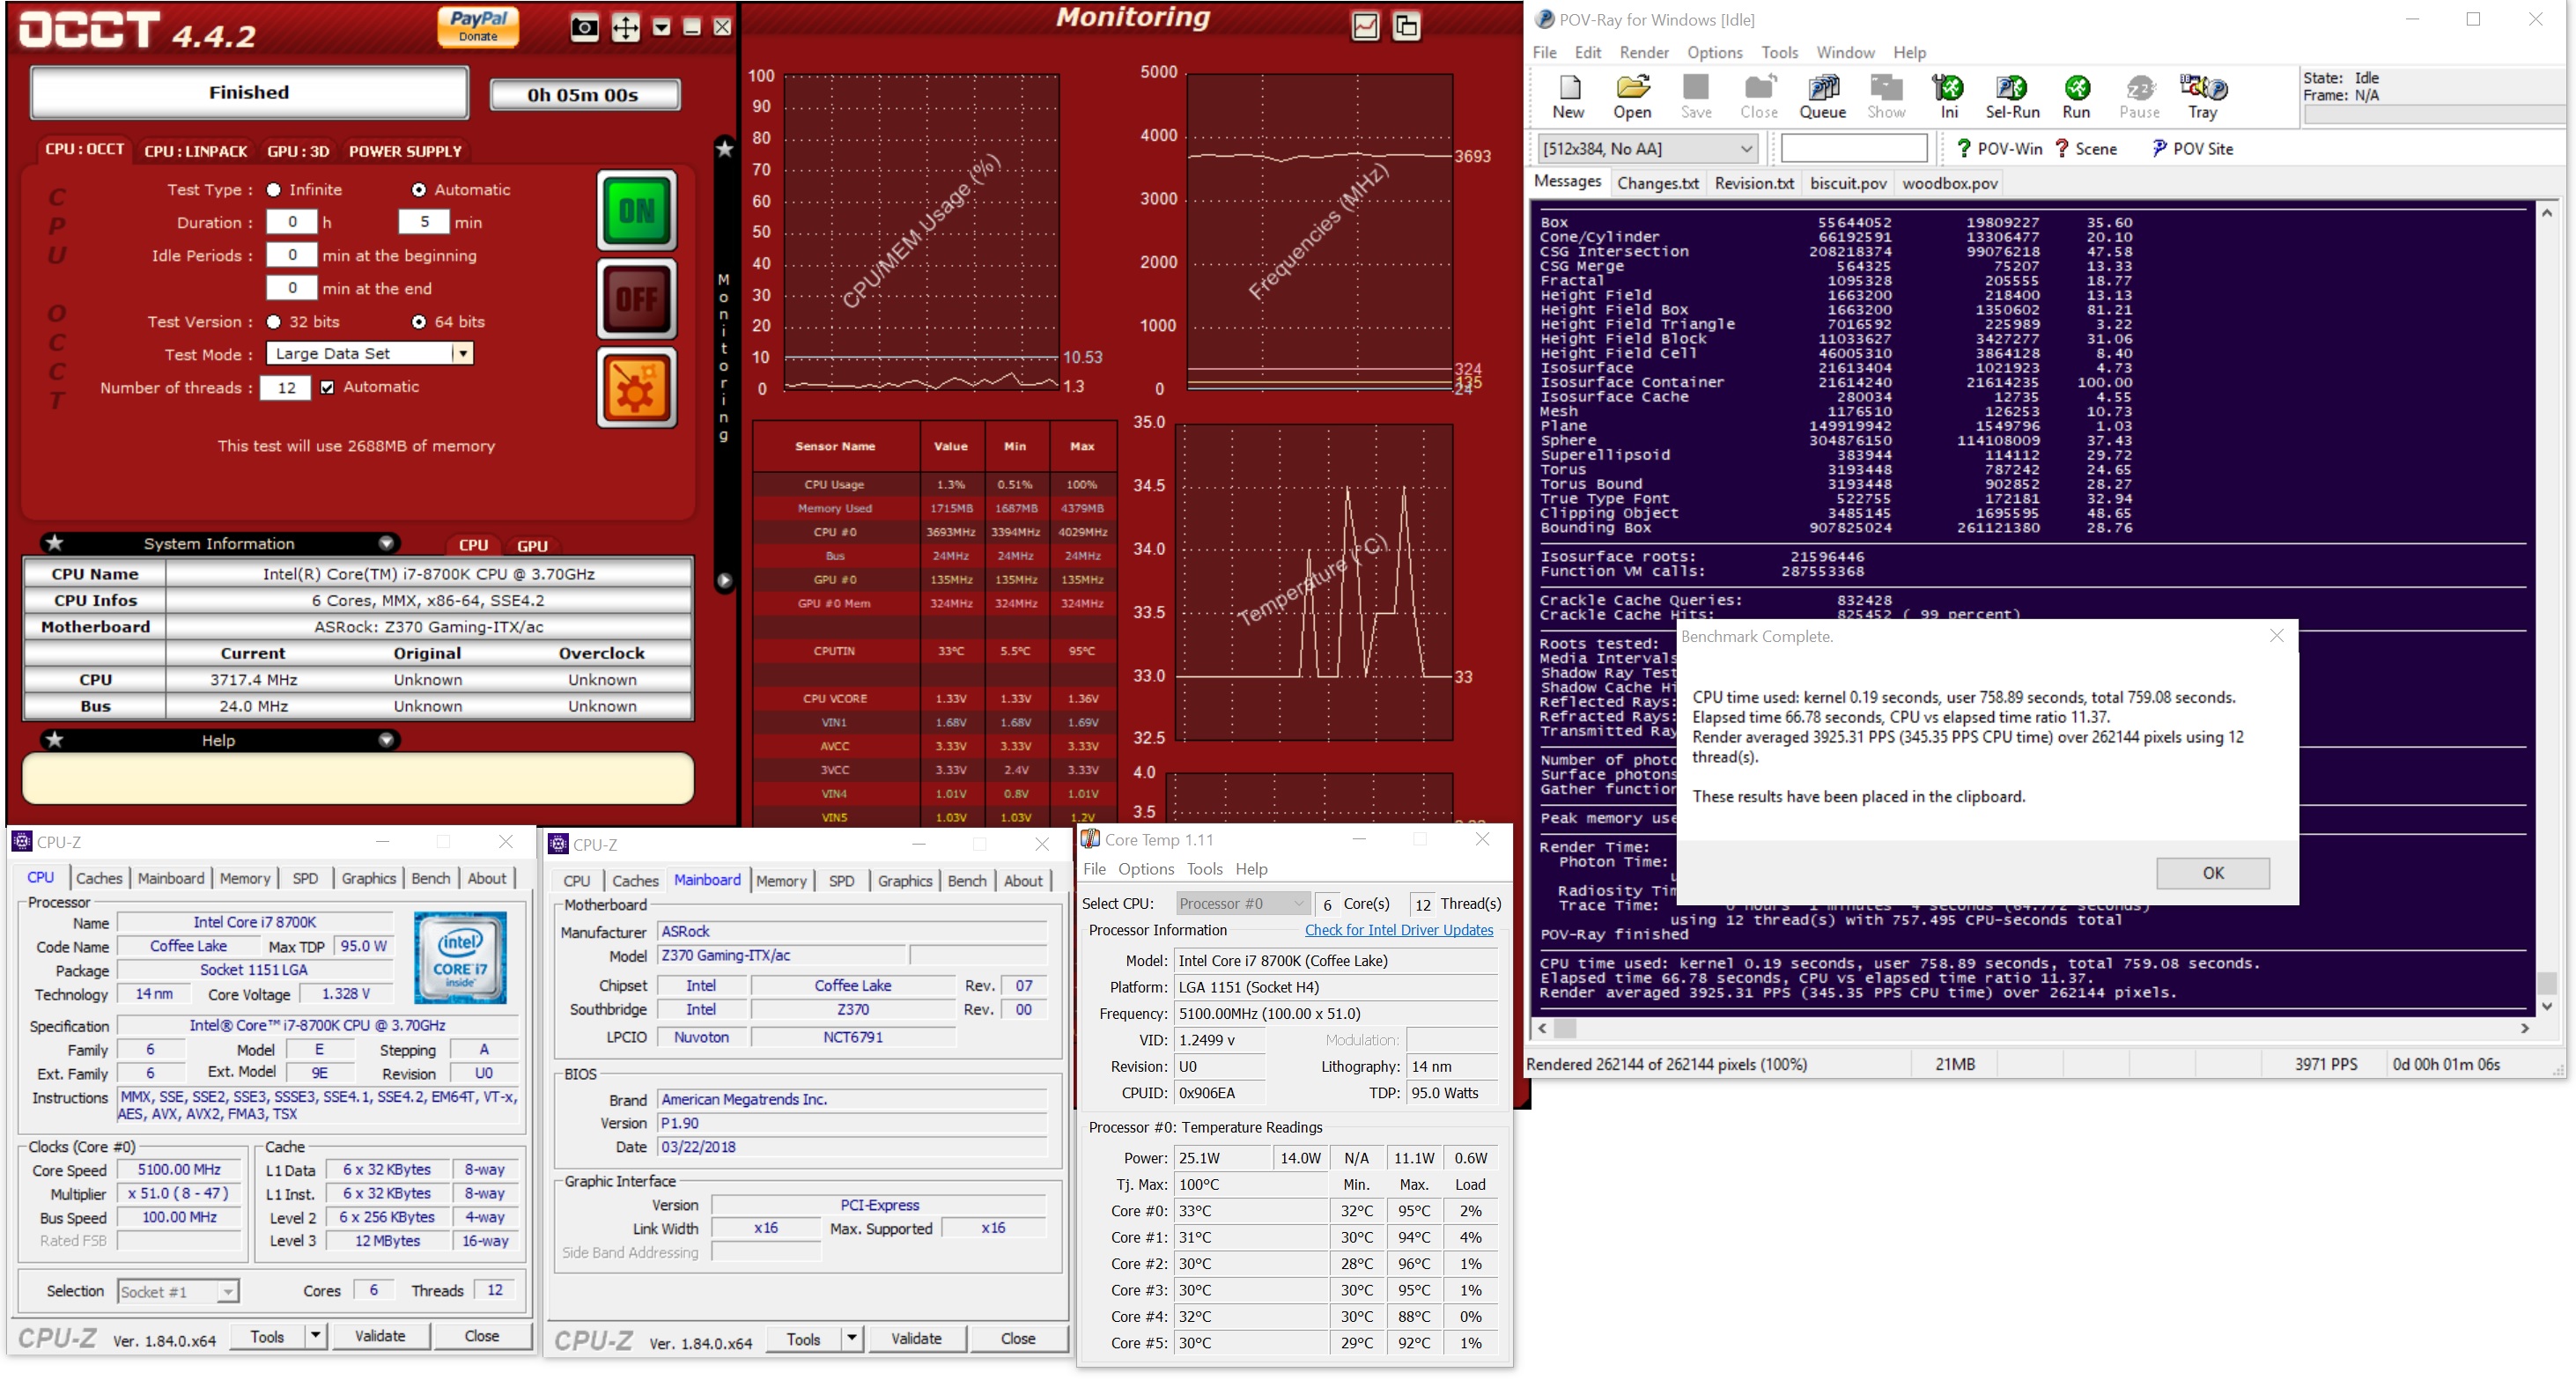
The ASRock Z370 Gaming-ITX/ac was able to take our i7-8700K 5.1 GHz using 1.328V. As is typical we are limited by our cooling methods and Intel's choice of thermal paste between the IHS and die. Compared to the Strix the Z370-I Gaming, the ASRock managed to use a bit less voltage at the high end by a small margin (1.344V vs. 1.36V). Overall, overclocking was without issue and the board seems perfectly capable to drive the i7-8700K to its ambient cooled limits.

Originally published at https://www.anandtech.com/show/12683/asrock-z370-gaming-itx-ac-review (Wayback Machine).